Konica Minolta and MYIRO
NOTE: For the graphics industry, Konica Minolta has rebranded its sensing division as MYIRO.
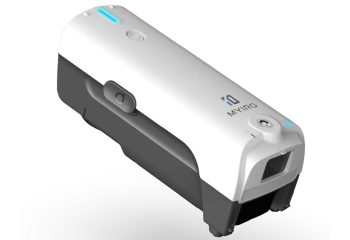
MYIRO-1 (Konica Minolta FD5-FD7)
Konica Minolta's FD-5 and FD-7 measurement devices are compatible with the FD-5 Interface. While the FD-7 can also measure spectrum data, the FD-5 can only measure the Lab data. The device's concept lies between Eye One and eXact. The FD-7 has a display that allows it to be used as a stand-alone tool for rapid measuring, but it also requires a ruler for scanning.
 |
NOTE: The FD-5BT flavor can only measure in scan mode due to license restrictions. This indicates that the automatic and manual modes of the FD-5 generation cannot be used with any other flavors, as they require scanning capabilities.
To measure a Target:
1 Check the ruler and notice the small translucent arrow. It is necessary to place this triangle/arrow on the left edge of the wedge.
2 The measurement device needs to be mounted with the display aligned to the left. The measuring device can only then be correctly mounted in the ruler.
3 Position the measurement device on the left just before the first patch (left edge of the ruler when aligned properly).
4 Push and hold the scan button.
5 Wait until the internal bulb lights up and an indicator sound is produced. Next, move steadily rightward until you reach the wedge's end (which is right next to the final patch).
6 Release the scan button.
NOTE: There is no need for a second scan in the case of M1 measurements.
NOTE: When measuring in spot mode, simply push down the device and the measurement will be executed instantly. Avoid pushing for too long, as this may prompt a second or even a third measurement.
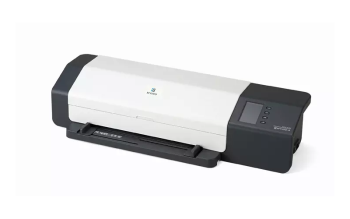
MYIRO-9 (Konica Minolta FD9)
The Konica Minolta FD-9 is a page-scanning spectrophotometer that can be connected directly to a USB port or via a LAN (UTP wired) to communicate over TCP/IP. The ability to use the device with multiple instances of different software, such as ColorTune Measure next to QMS for proofing, is the primary benefit of the TCP/IP connection.
In order for the FD-9 to receive a valid IP address based on the Mac address that can be consulted on the display, the network settings must be configured in the DHCP server (and eventually the DNS server). QMS does not need to be configured once the FD-9 is recognized in the LAN.
 |
To measure a Target:
1 The FD-9 uses an XML target description that is created during the target's export phase instead of a Color ID strip.
2 Prior to measuring the target, load the target description XML; the target will then load automatically; no selection of the target is required.
3 Next, click Measure. The target description XML will be sent to the FD9 and can be loaded from the job list as soon as the measurement window opens.
4 To access the FD9's job list menu, press the OK button. Using the arrow buttons, choose your job from the list of jobs, then click the OK button.
5 Insert each page as the display indicates.
6 QMS will receive the measurement data per page (green star).
NOTE: If there is a problem with the FD9 (such as a page feeding in crooked), open the FD9 lid and take out the target. An error will be reported by QMS.
NOTE: Closing the lid and clicking the OK button in the QMS, will restart the measurement on the FD9 from the first page.
doc. version 13.1.3