Tiles in the Layout Editor
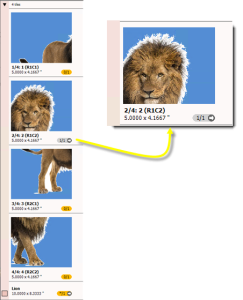
The tiles of a tiled image appear as individual images in the Product panel of the Layout Editor. They form a group of images enclosed in a light blue box together with the master image. Tiles can be placed on sheets just like other images by dragging and dropping, or using the Auto Layout feature. Selecting the master images automatically selects all the tiles and places them on the sheet.
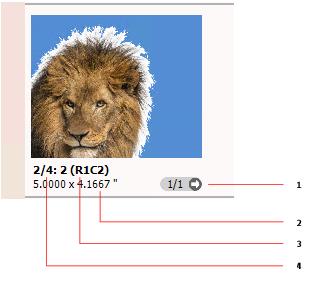 |
1 Instances of an image on all the sheets of a job 2 Tile size 3 Position in the montage scheme: R1C2: Row 1; Column 2 4 Tile number: e.g. 2/4: tile number 2 of a total of 4 tiles |
Expand or collapse a tiled image
1 To expand a tiled image and see the individual tiles in the Product panel, context-click the tiled image and choose Expand Tiles.
2 To collapse the tiles of a tiled image, context-click a tile or the master image and choose Collapse Tiles, or double-click the master image.
 |
doc. version 13.1.1