Measuring the Press Sheet Components
Apogee Impose can display a large number of fixed measurements on the Press Sheet, or you can choose to define your own measurements with the Measurement tool.
Fixed Measurements
Fixed measurements of the Press Sheet and its components, the margins, gutters and the gripper are available at all times for all Press Sheets.
OR
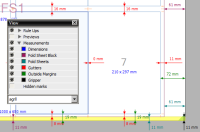
Open the View Options palette, expand the Measurements item and choose the measurements you want to see:
•Dimensions: Page, Fold Sheet and Press Sheet sizes
•Shingling: the amount and direction of shingling effects
•Fold Sheet Block: distance to the edge of the Press Sheet
•Fold Sheets: distance to the edge of the Press Sheet
•Gutters: distance between trim edges of Pages within the same Fold Sheet
•Outside Margins: distance from outside trim edges of the Page to the edge of the Press Sheet
•Gripper
NOTE: Use the shortcut CTRL+SHIFT+R to switch measurements on and off.
 |
Custom Measurements
The Measurements tool lets you make detailed measurements on the Press Sheet and determine the distance between components on the sheet. Several measurements can be made and remain visible simultaneously, even when you switch back to another tool. These measurements are updated according to any changes made to the components.
When you have finished measuring, you can clear all the measurements from the Press Sheet View. Measurements are also removed if you close the Press Sheet View.
NOTE: Show/Hide Measurements in the View Options palette or when chosen from the View menu does not affect custom measurements.
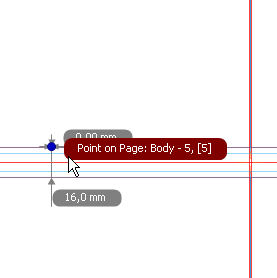
Each component has 9 reference hot spots: 8 around the edges and 1 in the middle. These are indicated with a blue dot. Measuring between hot spots provides two-dimensional measurements where applicable.
Two methods exist for measuring:
•Single-clicking 2 reference points
•Double-clicking a component
To measure the distance between reference points
1 Click the Measurement button in the Toolbar.
The cursor displays a number 1.
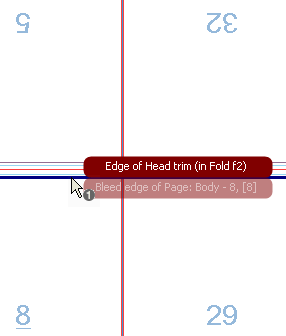
2 Hover over the component you want to start your measurement from, for example a Page, Mark or Rule-up, and click to fix the first reference point.
 |
NOTE: Press Esc to cancel a reference point.
3 Click a second time to fix the second reference point.
 |
To display the measurements of a component
1 Click the Measurement button in the Toolbar.
The cursor displays a number 1.
2 Double-click a component, for example a color bar.
If applicable, the width and height of the component are displayed automatically.
 |
To measure between two hot spots (two-dimensional)
1 Click the Measurement button in the Toolbar.
The cursor displays a number 1.
2 Hover over the component you want to start your measurement from, for example a Page, Mark or Rule-up, but locate a hot spot (blue dot) before clicking to fix the first reference point.
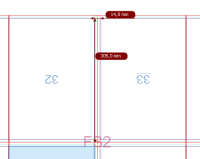
3 Click another hot spot to define the second reference point.
You now have two measurements between your reference points.
 |
doc. version 13.1.1