Marks Palette
The Marks palette in the Press Sheet View is used to place marks manually on the Page, Fold Sheet or Press Sheet. In other words these marks do not depend on conditions and they can be placed relative to any possible object on the page or sheet.
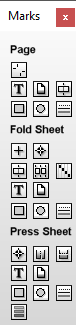
The palette contains the following marks categories:
•Page Marks: e.g., Page Crop
•Fold Sheet Marks (bound jobs)/Element Marks (unbound jobs): e.g., Fold Line, Cut, Collation
•Press Sheet Marks: e.g., Registration marks
The various mark types in these categories are managed in the Mark Engraver Resource of the Impose Task Processor. Refer to “Mark Engraver” and “Mark Types” for more information about the different types of marks and their settings.
CAUTION: Marks placed manually may be positioned at unexpected locations and on other sheets than the sheet you are working on.
To place a mark manually
1 Click the Marks button in the Toolbar or choose Window > Marks Palette to show the Marks palette.
 |
The Marks palette is displayed.
 |
2 Hover over the icons to see what kind of marks are available.
3 Drag the required mark onto the Press Sheet.
The Marks Inspector appears with default settings for the selected mark.
4 Change the settings as required.
To add a mark to a Mark Set
Once a mark has been added to a page or sheet, it can be included in a Mark Set.
1 In the Marks Inspector, click the cogwheel in the bottom left corner.
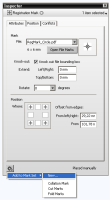 |
2 Choose an existing Mark Set or choose New to create a new Mark Set for your manually placed marks.
To move/copy a mark
The following marks can be moved and/or copied:
•File
•Rectangle
•Circle
•Line
•Text
1 Select the mark you want to move, drag it to the desired location and release the mouse button.
2 To duplicate the mark, press CTRL.
A + sign is displayed.
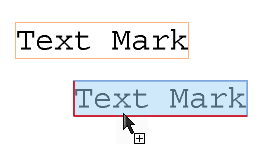 |
The original mark reappears at the original location and a copy is created when you release the mouse button.
NOTE: Marks can only be moved and copied one by one.
doc. version 13.1.1