Positioning Palette
For the complex positioning of elements in mainly unbound products, you can switch to manual positioning in the Product View and use the Positioning palette.
In this mode, Apogee Impose snaps dragged elements to align with other elements when they are close to these other elements and you can suppress margins and bleed if you want.
NOTE: If you do not switch to manual positioning mode, Apogee Impose continues to apply its rules as you reposition the elements on the Press Sheet.
To switch to manual positioning mode
1 Click the Press Sheet node you want to apply manual positioning to.
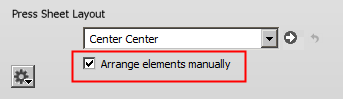
2 In the Inspector, select the arrange elements manually check box in the Press Sheet Layout pane.
 |
OR
Click the Positioning button in the toolbar to open the Positioning palette and select the arrange elements manually check box at the top of the palette.
 |
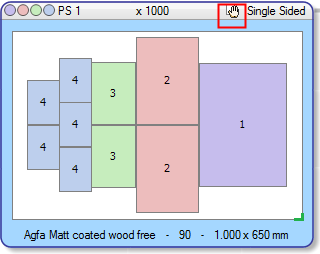
The manual positioning icon is displayed in the title bar of Press Sheet node.
 |
You can now override the selected Press Sheet Layout rule and position the elements individually or in groups on the Press Sheet.
Positioning elements with the Positioning palette
The Positioning palette is used to arrange elements on the Press Sheet. Depending on whether you have one or more elements selected, the Positioning palette activates relevant tools.
1 Click the Positioning Palette button in the toolbar...
 |
... to open the Positioning palette and select the arrange elements manually check box at the top of the palette.
2 Select one element.
You can now either position the element by filling in a Horizontal and Vertical position (1)or you can choose one of the Align in Sheet options (2) to align along the top, left, right, bottom, center of the Press Sheet. If you select the Align to margins check box, the reference edges are the sheet margins as set in the Press Sheet Layout rule.
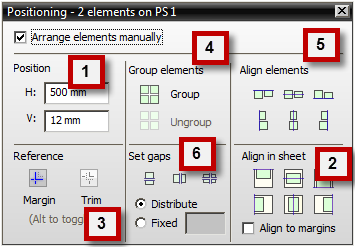 |
3 While positioning and aligning the elements you can click the Margin or Trim buttons (3) to choose a reference: either the page trim box or the box extended with the page trim margins. You can toggle between these two references by holding down the ALT key.
4 Select two or more elements.
You can now Group the elements (4) and align the group in the sheet (top, left, right, bottom, center) (2), or align the selected elements with each other (5).
You can also change the reference here for aligning by holding down the ALT key (3).
You can also use the Set Gaps tools (6) to distribute selected elements vertically, horizontally, or both, so that the gaps between the elements are the same. If the gap size is not specified (Distribute), the outermost elements keep their positions and the elements in between move; if a gap size is specified (fixed), the left most or bottommost elements remain in position and the others move.
Manual positioning by dragging elements
1 Drag elements from the Flat nodes to the Press Sheet or use the Step & Repeat tool to copy elements already on the sheet.
2 Select one or more elements using conventional Windows key combinations.
3 Drag the element or group to the desired position.
 |
Apogee Impose snaps the element or group to align with the Press Sheet margins, edge or gripper or with the edge of other elements, highlighting the edges as you drag. You can also snap to the trim box by holding down the ALT key.
The following color code is used for this highlighting:
Snap element to... | highlight |
|---|---|
Edge of other element | solid cyan |
Gripper | solid magenta |
Press Sheet Margin | dashed magenta |
Press Sheet Edge | dashed cyan |
NOTE: An error icon appears if the positioning has created a conflict. Open the Snag List for details.
Reverting to the Press Sheet Layout rule from manual positioning
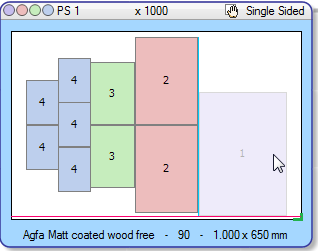
You can always revert to automatic positioning by the Press Sheet layout rule. If the manual arrangement contains overlapping elements, these elements are rearranged so there is no overlapping and they can be cut.
Apogee Impose applies the Press Sheet Layout rule set for the product.
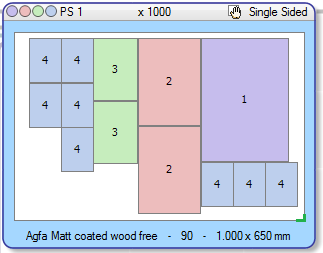 | 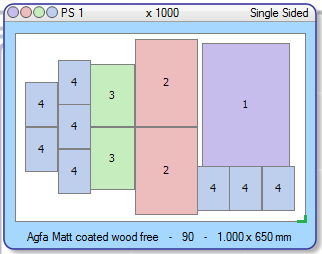 |
Elements positioned manually | Reverted to Center Center rule |
NOTE: The layout may be different than the initial layout after reverting.
doc. version 13.1.1