Measuring Ink Coverage
The Inks palette indicates the percentage of ink that is used in any given area of the currently active Preview window. This feature is used in conjunction with the Marquee tool.
To measure the ink coverage of a selected area
1 Select the Preview window which contains the image you want to measure.
2 Make sure the Inks palette is displayed and the Cursor/Selection button is selected.
3 Select the Marquee tool.
 |
4 Click and drag the mouse to define a rectangular area in the Preview window.
The selected area is displayed with a dotted outline.
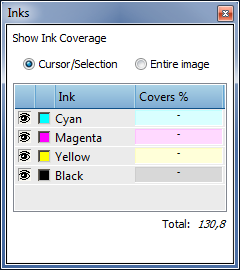
The Inks palette displays the ink coverage within the selected area. To indicate that it is not the global coverage, the total percentage is displayed in italics. If no area was selected, the ink coverage for the entire active Preview Window would be displayed, and the total percentage would be displayed in normal characters.
 |
The ink coverage percentage is displayed for each process color, and any spot colors. This information is calculated on the basis of the real pixel data, and is accurate to within around 3%. When zoomed in at 1:1, the information is accurate to 1%.
NOTE: Calculating ink coverage might take a while. A dash is displayed until the result has been calculated. When you change the selection, Preview restarts the calculation; you do not have to wait for the calculation to finish.
5 If you wish, you can select the rectangular area you defined in the Preview window, and drag it around to measure different areas of the image.
6 Click outside the rectangular area to cancel this selection.
When calculation is off, or in progress, the Covers % displays dashes (-).
NOTE: When the Inks palette is displayed, it is updated every time a new area is selected in the Preview Window. If an ink is deselected in the Inks palette, no Cover % for that ink will appear.
To measure the ink coverage at cursor point
1 Select the Preview window which contains the image you want to measure.
2 Make sure the Inks palette is displayed and the Cursor/Selection button is selected.
3 Click where you want to measure the ink coverage.
The Inks palette displays the ink coverage within the selected area. To indicate that it is not the global coverage, the total percentage is displayed in italics.
To measure the ink coverage of the whole page/image
1 Select the Preview window which contains the page or image you want to measure.
2 Make sure the Inks palette is displayed and the Image button is selected.
The Inks palette displays the ink coverage for the entire active Preview Window. To indicate that it is the global coverage, the percentages are displayed in normal characters (not in italics).
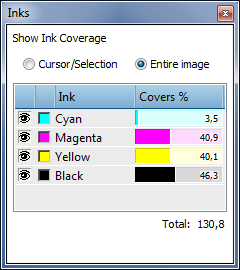 |
The ink coverage percentage is displayed for each process color, and any spot colors. This information is calculated on the basis of the real pixel data, and is accurate to within around 3%. When zoomed in at 1:1, the information is accurate to 1%.
NOTE: Calculating ink coverage might take a while. A dash is displayed until the result has been calculated. When you change the selection, Preview restarts the calculation; you do not have to wait for the calculation to finish.
When calculation is off, or in progress, the Covers % displays dashes (-). If an ink is deselected in the Inks palette, no Cover % for that ink will appear.
doc. version 6.1.1