Fitting Options Dialog Box
The Fitting Options dialog box gives you more detailed control for fitting a product within the frame.
OR
OR
NOTE: You can only set the crop values for products in the Product panel.
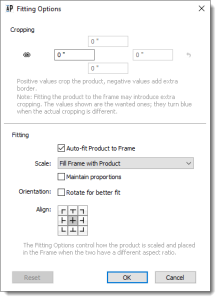 |
Cropping
The values that you want to apply to products in the frame. If the product fits in the frame exactly, the four values are zero, for example when you drag a product onto a sheet. Positive values crop the product by shifting the product outside the frame. Negative values create more space, a border, between the product and the frame. Values in blue mean the Auto-fit settings have introduced extra cropping.
Fitting
Here you specify the Auto-fit settings for fitting the product inside the frame.
Auto-fit Product to Frame
Select this check box to choose a Scale and Orientation for fitting the product automatically in the frame. The check box is selected by default for placed products (i.e. products that you dragged on the sheet).
Scale
The following options are available to scale the product when Auto-fit is selected:
•Fit Product to Frame: scales the product so it fits completely in the frame which is not necessarily filled.
•Fill Frame with Product: scales the product so it fills the frame and crops the product if necessary.
•Fill Product to Frame Width: scales the product so its width fits that of the frame.
•Fill Product to Frame Height: scales the product so its height fits that of the frame.
Maintain proportions
Keeps the width and height scale factors the same when scaling.
Orientation/Rotate for better fit
Rotates the product to match the aspect ratio of the frame when Auto-fit is selected.
Align
Sets the alignment of the product in the frame.
Reset Button
Resets the product to fill the frame.
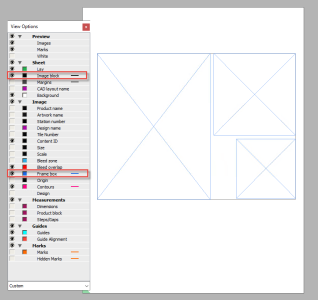
Adding frames to a Sheet
1 On the sheet where you want to draw a new frame, select the Frame tool on the toolbar at the bottom of the Layout Editor.
 |
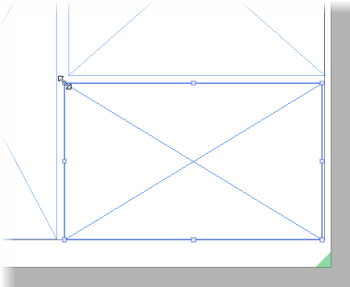
2 On the sheet, click, drag and release the mouse to draw the frame.
A frame has an outline and two diagonals from corner to corner. The color depends on your View Options settings.
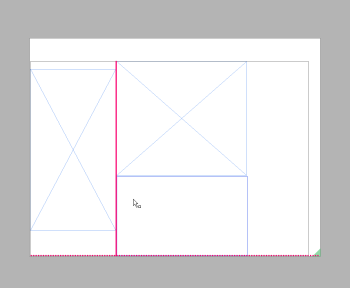
3 With the Frame tool still selected, you can draw additional frames on the sheet.
 |
The product block expands accordingly as you add more frames.
4 To position your frames, click the Selection tool in the toolbar and now you can select the frames.
 |
The outline is thicker and has resizing handles.
5 Use the Positioning toolbar to arrange the frames just like you would do with products.
 |
The same snap guides are available to help you align frames with edges and margins.
Rearrange frames
Naming frames (content IDs)
Frames that you draw on a sheet are initially so-called unnamed frames. Frames created by dragging products on the sheet are also unnamed. It is possible to assign content IDs ([A[, [B], [C], etc.) to frames for automation purposes, and these frames are called named frames.
Named frames allow you to use the same product in multiple frames by simply dragging the product once onto the sheet. Each product is placed in the position and with the size, frame rotation, and fitting options specified for the different frames.
NOTE: Content IDs do not work across multiple sheets. For example, placing a product in a frame with Content ID [A] on Sheet 1 does not fill frames with the same ID on Sheet 2.
Named frames are extremely useful when creating sheet layout templates.
Naming empty frames (interactively)
Empty frames on a sheet can only be named manually because they have no content.
1 Draw the frame on the sheet with the Frame tool.
|
2 Switch to the Selection tool and select one or more frames.
3 In the Product Inspector, enter an ID in the Content ID box.
4 Click outside the ID box, and the ID is displayed in the center of the frame.
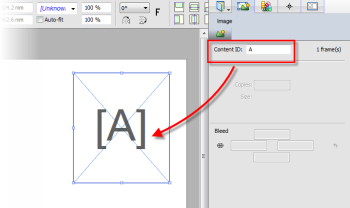 |
If you selected multiple frames, the same ID is assigned to each frame.
You can edit the content ID as long as no products are placed on the sheet.
Naming filled frames
If a sheet contains at least one product, you cannot use the Product Inspector to assign content IDs interactively. You would have to clear all the frames first.
However, there are two methods for naming filled frames automatically: by saving the sheet layout as a template (see “Sheet Layout Templates”), or by using the Assign Content IDs command. This command lets you assign IDs to filled frames without clearing all the products from the sheet.
1 Select the products you want to name on the sheet.
2 Choose Layout > Assign Content IDs.
The selected products are assigned unique IDs and instances of the same product have the same unique ID. If you didn’t select any products, then all the frames with products on the sheet are assigned IDs, and empty frames are not assigned IDs.
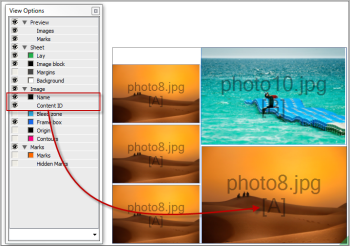 |
The content ID is displayed under the product name if this is set to show in the View Options.
The content IDs are also displayed under the thumbnail of the original product in the Product panel.
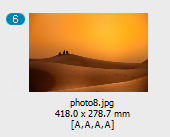 |
In this example you can see that the product has been assigned to 4 frames with content ID [A].
NOTE: The same product can also be assigned to frames with different IDs, for example, [A,A,B,C,D,D].
3 You can repeat the Assign Content IDs command if you drag more products on the sheet. New, unique IDs will be assigned and this is also the case if you add the same original product.
4 You can clear the IDs of selected products or all the IDs by choosing Layout > Clear Content IDs.
NOTE: If all of your frames have IDs, it’s not possible to re-assign IDs, for example when you have deleted a product from the sheet.
doc. version 6.1.2