Barbieri
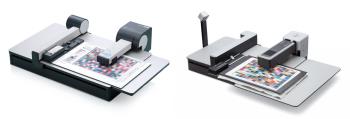
Barbieri Spectro LFP and Specto LFP qb work similarly and need the same way of handling. The Specto LFP qb allows you to set a measurement mode by clicking on the settings button.
NOTE: QMS will only show the Barbieri devices as available devices if a physical device is actually connected with a working device driver. Otherwise, it will not appear in the list of available spectrophotometers.
Spectro LFP and Spectro LFP qb
Install the most recent device driver available from the application CD or use the Apogee Client installer as described on
“To install a Measurement Device:” in order to use the Spectro LFP.
Measurement Description File
The device is not able to use an ID strip. To match the measurement data with the Apogee databases, QMS will use measurement description files.
NOTE: It may take a while to retrieve measurement description files without any status update.
NOTE: QMS can connect to Barbieri LFP/LFP qb devices which use either the ECO3 encrypted protocol of Barbieri or the open protocol of Barbieri. Connecting with a device that uses another encrypted protocol from other OEM partners of Barbieri will fail.
To measure a Target Spectro LFP:
NOTE: QMS can export targets for both reflective and transmission measurements, but be aware that, all default resources are based on reflective measurements.
1 Double-click on the Spectro LFP icon to design the target layout, eventually for transmission measurement. If transmission measurement are required, the layout will be changed so that an area is reserved for device calibration.
2 During printing of the targets, a Barbieri job ID is created in the QMS database which is required to initiate measurement of the printed targets.
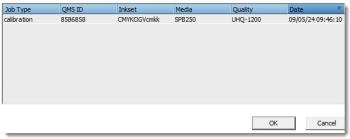
3 When initiating a measurement with the Barbieri Spectro LFP, a dialogue prompts to open the Barbieri job ID that was saved in the QMS database. Select the relevant job and click OK. The measurement dialogue will open.
4 Click the Settings button to set the appropriate parameters.
5 The device can automatically select the appropriate aperture size, while you can also select one of the 3 sizes (2, 6 or 8 mm).
NOTE: It is recommended to use large patch sizes, if you want to measure with a large aperture.
6 The measurement mode can be either Fast (semi scanning mode), Up/down (more accurate positioning but slower), or Contactless (for sensitive targets (e.g. scratch sensitive media/inks).
7 Per patch, multiple measurements can be enabled along with a vertical and horizontal offset between each measurement (larger patches may be required).
8 After clicking the “Measure” button, a message warns you to mount the correct page of the target on the Spectro LFP.
NOTE: You need to measure the different pages in the correct order. There is no automatic page recognition, when measuring with the Barbieri Spectro LFP.
NOTE: Position the target always inside the marked area.
NOTE: The Spectro LFP tries to find the reference position automatically based on the black sidelines. If this detection fails, a manual method is offered to define the reference positions. Use the keyboard arrows to position the white marker of the device-head on the aim marks and click + for the 3 positions.
To measure a Target with Spectro LFP qb:
1 The Spectro LFP qb works similar to the normal Spectro LFP, except that this version comes with an optical camera that improves the detection position of the targets on the measurement table.
2 After each row, the measurement data are visualized in the GUI. After each page, a message is given to mount the next page on the sample-holder, until all pages are measured.
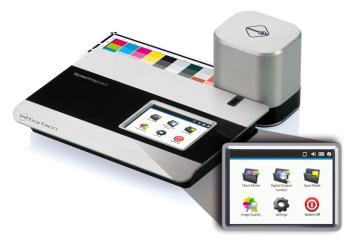
Spectropad
The Spectropad can retrieve a target's layout without the need for Color ID strips, like the Barbieri Spectro LFP.
Measurement Description File
During printing a wedge, a Barbieri job ID will be saved. To measure the wedge, click Measure to open the file and in order to send the details to the Spectropad.
CAUTION: Because the mini-USB connector on a USB cable can be easily disconnected by movements of the device, use caution when connecting it. In this case, the measurement wizard needs to be redone completely. Press the Stop Measurement button first, and then press the red cross located on the Spectropad's tough panel.
QMS does not support connections via WIFI.
Connecting to the device may take a few seconds, before prompting to load the XML file that was saved during export of the target.
As with any measurement device, the patch size can be customized by double-clicking on the Spectropad icon.
To measure a Target:
1 In the measurement window, first select Barbieri Job ID of the printed target that you want to measure.
2 Measure the different strips of the target from the highest row number to the lowest row number. The direction of the scan can be both left to right or in opposite direction.
3 Position the head in front of the row number as indicated on the touch panel. A red LED position light will be projected on the target.
4 Move the measurement head gently and with a continuous speed over the row. The touch panel indicates the speed and in case of possible problems requests confirmation or rejection of the measurement before sending to QMS.
5 On the display of the Spectropad, the strip which needs to be measured is mentioned. Eventually when the measurement was not as expected, the Spectropad will ask either to confirm or decline a measured strip.
The measurements are managed and provided to QMS row by row. In case the measurement of a row (Strip) is deleted, the Spectropad will first continue with the remaining rows and afterwards request to measure the rows of which the measurements were deleted.


