Measuring a Strip
Measuring a wedge in QMS depends on the selected measurement device. Each device has a slightly different way of working.
Epson SpectroProofer:
QMS jobs with automatic measurement device will automatically measure and store the measurements (depending on the job type) for user interaction or just proceed.
•Calibration: measures and automatically updates the calibration (no user interaction).
•Proofer Check: waits for operator to apply the measurement and deletes afterwards.
•Profiling: measures and stores the measurement. The measurement will be kept after using to allow creating multiple variants of a proofer profile from the same measurement file.
•Profile Optimization: waits for operator to apply the measurement and deletes the file afterwards.
•Proofing Reference Check: measures and automatically applies the measurement. The result is stored in the QMS History database, while the measurement file is removed.
1 Select a Proofer (e.g. Epson P5000) in the Output section of the modules window.
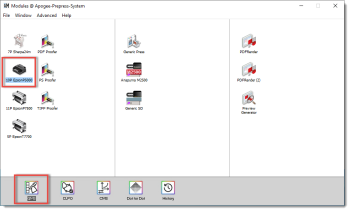 |
2 Double-click QMS. The Quality Management for Proofer window appears.
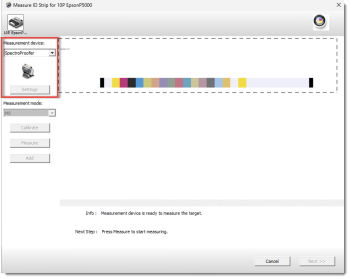
3 Click the Measure button and select the SpectroProofer from the drop-down list.
NOTE: The SpectroProofer will not be listed, if the Apogee is not able to reach the device. Check if the device is connected correctly, and there are no network issues.
 |
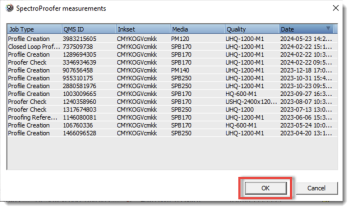
4 The SpectroProofer measurements pane will be displayed. Select the right measurement file (job type) and click OK to apply the measurements and proceed with the next step of the wizard.
 |
X-Rite, Barbieri, Konica Minolta (Myiro), and Techkon Devices:
1 Select a Proofer (e.g. Epson P5000) in the Output section of the modules window and double-click QMS. The Quality Management for Proofer window appears.
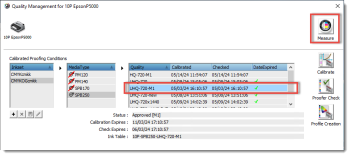
2 Select an ink set (e.g. CMYKOGcmkk), a media type (e.g. SPB250), and a quality mode (e.g. UHQ-720-M1). Click the Measure button.
 |
3 Select the measurement device (e.g. i1IO2). Measure ID Strip window will appear. Press Measure to start the measuring.
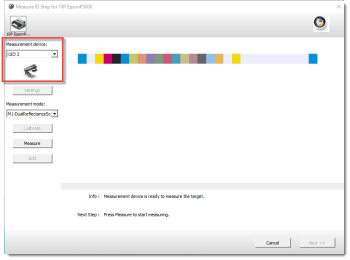 |
4 The following actions will be automatically adapted to the type of task and the specifications of the measurement device:
•X-Rite, MYIRO, and Techkon: Measure the ID strip, the QMS will identify the target and type of work.
•Barbieri and Konica Minolta: To continue, select the measurement file.
NOTE: The internal ID of the strip is always printed in the border of the QMS printed wedges. Check the ID with the measurement files.
5 Click OK.
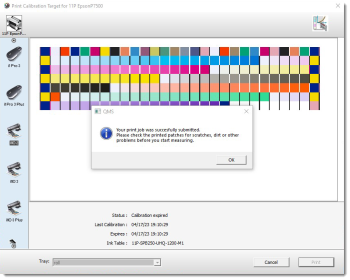 |
To open the measurement device setup settings:
Before you start measuring the strip/target, you can display the measurement device setup settings. The Setup settings show information about the connected measurement device and the settings are measurement device dependent.
For example:
The i1 measurement devices require a manual calibration before the strip/target can be measured. Follow the instructions on screen.
The i1 measurement devices require a manual calibration before the strip/target can be measured. Follow the instructions on screen.
The i1 iO and i1 iSis will automatically calibrate the measurement device.
The following window will appear:
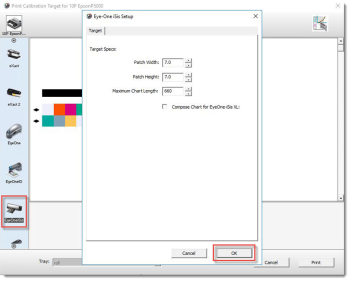 |
The EyeOne iSis Setup window will show information about the connected measurement device.
It is possible to enable or disable the usage of the UV-Cut filter when the connected device (e.g. EyeOne iSis) supports it. To accomplish this, you can select the relevant option from the Measurement Modes. See “Measurement Conditions”, for more information.
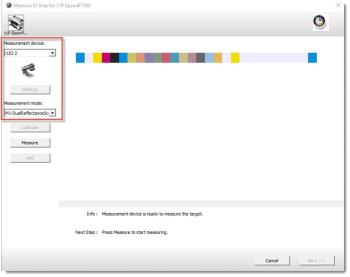 |
NOTE: Disabling the UV-filter will measure each strip two times. One time with UV-filter and one time without UV-filter but only the measurements without UV-filter are sent to QMS.
6 Click the OK button to apply the new settings.
doc. version 13.1.3