Product Pane
The middle section of the Product View displays the nodes of the Product where you can see how the Pages are assigned to Fold Sheets, Press Sheets and Presses.
TIP: If you have many parts or products, choose View > Compact View for a better overview.
For multi-product jobs, all the Products are displayed under each other in the order they were created.
1 Product with Pages 2 Parts 3 Book Signatures 4 Fold Sheets 5 Press Sheets 6 Presses with Printing Plates per Production Set | 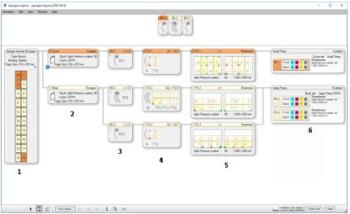 |
In each node you can see the settings for that particular node and you can also change these settings if necessary. When using Auto Impose, you may want to change the settings to fine-tune the imposition created automatically by Apogee. In manual mode, you will use the nodes more extensively to choose the appropriate settings. The same settings can also be inspected and changed using the Inspector.
Product and Pages
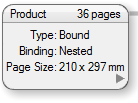 |
The Product node provides a summary of the Product definition: the name of the Product, Number of Pages, Type (e.g. bound), Binding (e.g. Nested), and Page Size (e.g. 210 x 297 mm).
Clicking the grey arrow on the right reveals the spine view of the Pages in their consecutive order with page numbers. The Parts are indicated in their respective colors.
 |
Page Icons
 | Pages not assigned to signature (grey outline) | |
 | Pages assigned to signature (black outline) | |
 | Shingling applied (black arrows) | |
 | No shingling applied | |
 | Bleed (thick grey border on bleed side) | |
Glue zones (blue strips indicate non-image areas) | ||
 | No spine (unbound product) | |
 | Double-sided part (unbound product - Fold Sheet node) |
Node Icons
The initial node definition has been overruled (yellow background if only gutters and/or margins have changed). | ||
The node contains an error that needs to be resolved. |
Modifying Shingling
Parts
A product consists of one or more Parts, e.g. a Cover and a Body part. Each Part is identified with a name and color, and they are sorted in ascending order of their lowest page number. The default colors are orange for Cover and yellow for Body but other colors can be chosen when defining the product.
A Part may consist of several book signatures.
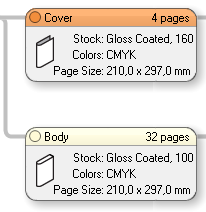 |
The following information is displayed but cannot be edited:
•Paper stock and weight
•Colors
•Page size
Book Signatures (hidden by default)
The book signatures in your assembly can also be shown as a column of nodes between the Parts and the Fold Sheet nodes. This is useful f or jobs using complex number-up schemes. You can show/hide this column by choosing View > Show/Hide Book Signatures.
Fold Sheets
This node shows the flat fold sheet and the folding scheme used to fold it. In general, different Fold Sheets are selected for different Parts.
1 Fold Sheet name 2 Folding Scheme 3 Blue triangle: top page 4 Fold Sheet 5 Book Signature and number of pages 6 Spine 7 Fold lines 8 Fold Sheet lay 9 Folding sequence | 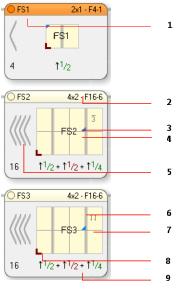 |
The Fold Sheet node contains the following information:
•Fold Sheet Name: same numbering sequence as the Press Sheets so FS1 corresponds with PS 1, FS2 with PS 2, etc.
•Folding Scheme (drop-down): the selected Folding Scheme is indicated in the top right corner.
•Fold Sheet with lowest page number (mirrored if this page is on the back)
The Fold Sheets are sorted by the lowest page number you see here.
•Book Signature icon with number of pages in Book Signature
•Spine
•Fold lines
•Top page after folding (blue triangle)
•Fold Sheet Lay (red corner icon)
•Folding Sequence: uses a special notation to indicate how many times and in which directions the sheet is folded
Selecting a Folding Scheme
1 Hover over the Folding Scheme name in the top right corner and click in the black field to reveal a list of folding schemes.
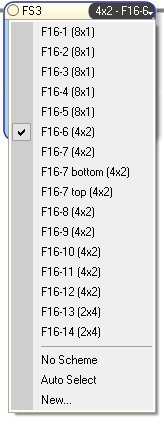 |
The list shows all compatible folding schemes, i.e. those that match the number of pages in the book signature.
2 Choose one of the Folding Schemes.
OR
Choose No Scheme to remove the current scheme.
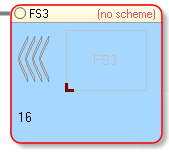 |
NOTE: Choosing No Scheme displays an error in the Assembly.
OR
Choose Auto Select to find the best matching scheme.
Changing a Folding Scheme automatically changes the arrangement of the pages on the Press Sheet.
Assigning a Fold Sheet to a Press Sheet
Press Sheet
The Press Sheet nodes represent all the Press Sheets for the product. Each Press Sheet node displays the front and the back of the Press Sheet that contains one or more Fold Sheets. In this view you can see how all the pages of the product are arranged for printing.
Clicking a component within the node highlights the component throughout the product structure.
1 Press Sheet name 2 Workstyle 3 Paper stock, weight and size 4 Press Sheet 5 Fold Sheet 6 Lowest page no. (bright yellow) 7 Fold Sheet Lay 8 Press Sheet Lay | 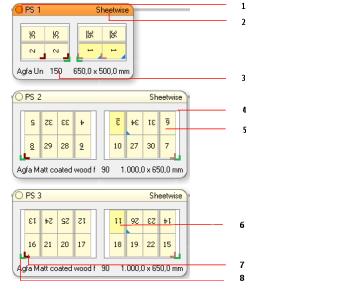 |
The Press Sheet node contains the following information:
•Workstyle (drop-down):
•Sheetwise: A sheet has different content on front and back sides. The sheets are turned, keeping the gripper edge at the same side.
•Work And Turn: Both sides have the same content. The sheets are turned, keeping the gripper edge at the same side.
•Work And Tumble: Both sides have the same content. Sheets are turned in such a way that the gripper edge is on the opposite side.
•Perfecting: A sheet has different content on front and back sides. Sheets are turned in such a way that the gripper edge is on the opposite side.
•Single Sided: There is only one side per sheet.
•Web production schemes for web presses
•Press Sheet Lay: green icon which is lighter for the Back
•Press Sheet Sides: the Front and Back of the Book Signature; only one side for Work & Turn and Work & Tumble, or single-sided.
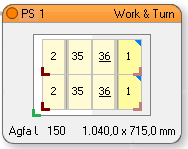 | 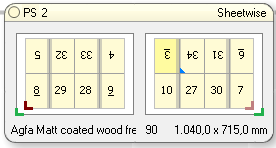 |
Work & Turn Press Sheet Front = Back | Sheetwise Press Sheet with Front and Back |
•Fold Sheet Front and Back with page numbers
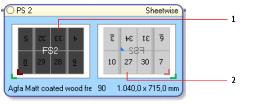 |
1 Front 2 Back |
•Fold Sheet Lay: red icon which is lighter for the Back
•Paper Stock (drop-down): as set for the Product or Part
•Paper Weight (drop-down): as set for the Product or Part
•Press Sheet Size (drop-down): as chosen in the Auto Impose window
NOTE: When performing interactive imposition (Edit Imposition), none of the above settings are specified. The missing settings are indicated in red and need to be chosen interactively.
 |
Selecting a Workstyle
1 Hover over the Workstyle name in the top right corner and click in the black field to reveal a list of workstyles.
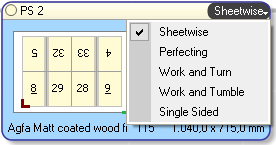 |
NOTE: The default workstyle is Sheetwise.
Selecting Stock Type
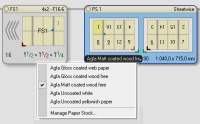 |
Selecting Stock Weight
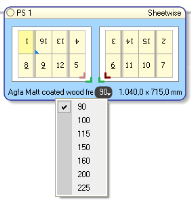 |
Selecting the Press Sheet Size
1 Hover over the Sheet Size in the bottom right corner and click in the black field to reveal a list of available weights for the selected stock.
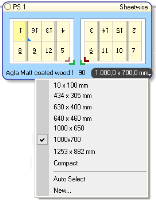 |
2 Choose a preset Sheet Size from the list.
OR
Choose Auto Select to select the smallest available sheet size for the fold sheets.
OR
Choose New to enter a new Sheet Size.
Opening the Press Sheet View
Press
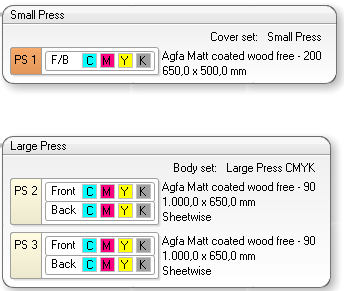
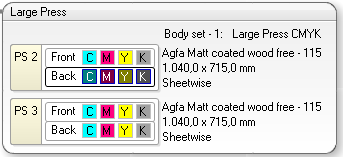
The Press nodes on the right in the Product View represent the available presses. Each Press node displays the Press Sheets assigned to a particular press and the plates necessary to print the Front and the Back in the required process or spot colors. All of these book signatures belong to the same Production Set.
Clicking a component within the node highlights the component throughout the product structure.
1 Press name 2 Production Set 3 Paper stock, weight and size 4 Work & Turn Press Sheet 5 Sheetwise Press Sheet (Front) 6 Sheetwise Press Sheet (Back) 7 Plates 8 Press Sheet name | 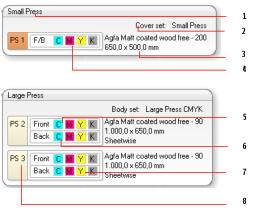 |
The Press node contains the following information:
•Press name
•Press Parameter Set
•Press Sheet information: stock, weight, size, workstyle
•Press Sheet name (PS1, PS2, etc.) with an indication of the plates for Front and Back (if applicable), process colors and spot colors
Arranging Press Sheets on a Press
Assigning a Press Sheet to a Press
Deleting a Press Sheet from a Press
OR
Editing Press Settings
Selecting a Press Parameter Set
1 Hover over the Press Parameter Set in the top right corner and click in the black field to reveal a list of Parameter Sets.
Parameter Sets for the selected Press are displayed.
 |
2 Choose a Parameter Set or click Manage Parameter Sets to create a new set.
NOTE: Only compatible Parameter Sets are shown in the list.
Opening the Press Sheet View
Example: Cover with Work & Turn workstyle and Body parts with Sheetwise workstyle assigned to the same press.
Example: Cover and Body parts assigned to different presses.
Example: A page selected in the Product node highlights the separations for that particular page.
doc. version 13.1.1

