Working with the Run List
The Run List displays the pages that have been selected from the Page Store, and that will be included in your job. A page in the Run List shows similar information to the same page in the Page Store. The page name is the document name as displayed in the Page Store, followed by the page number. Placeholders and blank pages do not have a name.
NOTE: If you are working with a versioning job, the layout of the Run List is considerably different (depending on the specific parameters of the input documents). For more information, refer to “Versioning Jobs in the Run List”.
To add pages to a Run List
2 Select the document and/or pages you want to add.
Pages that are not placed in the Run List have a green background.
For information on selecting several contiguous or non-contiguous pages, see “To select or de-select multiple jobs or items”.
3 Drag the documents and/or pages from the Page Store to the desired position in the Run List.
TIP: Press E to select even placeholders and press O to select odd placeholders while dragging pages to the Run List.
The status icon in the Job List indicates that the Run List is being edited:
 |
While you are editing the Run List, Apogee locks it to prevent other users from trying to edit it at the same time.Pages that are placed in the Run List now have a gray background.
After adding pages to the Run List, you need to submit your changes (see “To submit a ticket”). Other Clients will not see the newly added pages until they have been submitted.
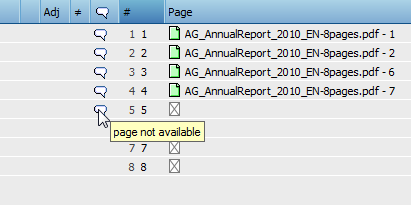
NOTE: If a page is to be added to the Run List, but fails before it reaches the Run List Task Processor (e.g. in the Normalizer), then it will not appear in the Run List. Instead, it will be marked as being in error in the Page Store. You will be alerted of this by a notification.
To select all, even, odd, or empty placeholders
2 Context-click on a page in the Run List.
3 From the context menu, choose:
•Select > All: to select all pages in the Run List.
•Select > Even Positions: to select all even numbered pages in the Run List.
•Select > Odd Positions: to select all odd numbered pages in the Run List.
•Select > Empty Positions: to select all empty placeholders in the Run List.
These options are useful for quickly setting up different page imposition settings for odd and even pages in a job.
To move pages around within the Run List
1 Edit a job, and select the Pages tab.
2 Select the page you would like to move in the Run List, drag it to an empty placeholder, and release the mouse button.
The page is moved to the new position.
You cannot simply drop the page on top of another page, or on a blank page. If you want to do this, see “To move-replace pages within the Run List”.
3 Submit your changes.
NOTE: Take care to ensure that any changes you make do not conflict with your imposition layout.
To move-insert pages within the Run List
1 Edit a job, and select the Pages tab.
2 Select the page you would like to move-insert and, while holding down the ALT key (Windows) or COMMAND key (Macintosh), drag it to another position in the Run List, and release the mouse button.
The page is removed from its original location and inserted at the selected position in the Run List.
3 Submit your changes.
NOTE: Take care to ensure that any changes you make do not conflict with your imposition layout.
To move-replace pages within the Run List
1 Edit a job, and select the Pages tab.
2 Select the page you would like to move and, while holding down the Shift key (both Windows and Macintosh), drag it to another position in the Run List, and release the mouse button.
If you drop the page on an empty placeholder, the placeholder is filled. If you drop the page on top of another page or a blank page, the page is replaced. The original page position becomes an empty placeholder.
3 Submit your changes.
NOTE: Take care to ensure that any changes you make do not conflict with your imposition layout.
To duplicate pages within the Run List
1 Edit a job, and select the Pages tab.
2 Select the page you would like to copy and, while holding down the CTRL key (Windows) or ALT key (Macintosh), drag it to an empty placeholder in the Run List, and release the mouse button.
The page is duplicated in the new position.
You cannot simply duplicate the page on top of another page, or on a blank page. If you want to do this, see “To duplicate-replace pages within the Run List”.
3 Submit your changes.
NOTE: Take care to ensure that any changes you make do not conflict with your imposition layout.
To duplicate-insert pages within the Run List
1 Edit a job, and select the Pages tab.
2 Select the page you would like to duplicate-insert and, while holding down the ALT-CRTL keys (Windows) or COMMAND-ALT key (Macintosh), drag it to another position in the Run List, and release the mouse button.
A copy of the page is inserted at the selected position in the Run List. The Run List is automatically extended by the inserted number of pages.
3 Submit your changes.
NOTE: Take care to ensure that any changes you make do not conflict with your imposition layout.
To duplicate-replace pages within the Run List
1 Edit a job, and select the Pages tab.
2 Select the page you would like to copy and, while holding down the Shift and CTRL keys (Windows) or Shift and ALT keys (Macintosh), drag it to another position in the Run List, and release the mouse button.
If you drop the page on an empty placeholder, the placeholder is filled. If you drop the page on top of another page or a blank page, the page is replaced.
3 Submit your changes.
NOTE: Take care to ensure that any changes you make do not conflict with your imposition layout.
Reverse the order of pages in the Run List
The page order in the Run List can be reversed while dragging them from the Page Store or by selecting placed pages.
2 Select the placed pages that you want to reverse and choose Edit > Reverse Page Order, or briefly press ‘R’.
OR
3 While dragging the pages on to the Run List, briefly press ‘R’.
The order of the pages is now reversed.
To insert blank pages in the Run List
2 Select the placeholder(s) in the Run List that you want to fill with blank pages.
3 Context-click on the selection, and choose Placeholder > Make Blank from the context menu (or click the Make Blank button in the Toolbar).
The empty placeholders are replaced with blank pages.
To fill all empty placeholders with blank pages
If your job contains a series of empty placeholders that are spread out throughout the Run List, you can fill them all with blank pages in one step.
2 Select all pages in the Run List.
3 Context-click on one of the highlighted pages, and choose Placeholder > Make Blank from the context menu (or click the Make Blank button in the Toolbar).
All the empty placeholders are replaced with blank pages.
To jump to a position in the Run List
2 Select the Run List pane.
3 Type the # character, followed by the placeholder position you want to jump to.
For example, type #33.
4 The selected Run List placeholder position is displayed.
Add a page comment in the Run List
The comment is displayed as text in the column or as a balloon icon if the column width is minimized; hover over the balloon icon to see the comment.
 |
After submitting the job, comments are visible for all users who can see the job in the Job List.
To adjust page imposition in the Run List
1 Select a job which uses imposition in the Production Plan, and edit it.
2 Open the Run List.
3 To change the layout of a page, do one of the following:
•Context-click the page in the Run List, and choose Page Adjustment > Offset By...
•Context-click the page in the Run List, and choose Page Adjustment > Scale By...
•Context-click the page in the Run List, and choose Page Adjustment > Rotate By...
4 Make your changes as described in “Imposition Adjustment”.
Any pages that you modify in this way are flagged in the Run List with the following icon:
 |
By default, Apogee shows the simple page adjustment view. However, you can select View > Extended Page Adjustments to switch the view. For more information, refer to “Run List Page Adjustment Icons”.
5 Submit the job to save your page adjustments.
You can also access all imposition options in a single dialog box. To do this, you must first edit the page, and then context-click it and choose Page Adjustments > Edit from the context menu.
NOTE: The Page Adjustments dialog box displays the cumulative page adjustments you have made, unlike the individual offset, scaling, and rotating dialog boxes, which do not indicate any previously applied adjustments.
For example: if you set a 4 mm offset on a certain page and then select Page Adjustments > Edit, you will see that there is an offset of 4 mm for that page. If you add a second 4 mm offset for this page and again select Page Adjustments > Edit, you will see that there is a cumulative offset of 8 mm.
doc. version 13.1.1