Impose Settings
This dialog box allows you to specify how imposition will be applied in the currently selected Parameter Set. This is also where you can select the Apogee Impose module to perform your imposition.
You can access these settings:
•When creating Parameter Sets (see “Managing Parameter Sets”). Here, you will see a ‘Lock in Production Plan’ check box (selected by default). If this check box is selected, the settings will be initially locked in the Settings pane. If this check box is deselected, the settings can be edited in the Settings pane.
•In the Settings pane, in the Plan tab of the Job Manager and the Ticket Editor. The settings may be initially locked, as indicated by the Lock icon. If you edit the job, you can unlock them as described in “Settings Pane (Ticket Editor)”.
Name
The name of the Parameter Set as it will appear in the Production Plan. When you create a Parameter Set, you should specify a Parameter Set name. You can always change this name later by editing the job, choosing the Parameter Set from the Task Processor in the Plan tab, and unlocking the settings in the Settings pane.
Imposition Selection
Undefined
Allows you to defer the selection of an imposition layout, and still submit a job.
From input
Select this option if you want to import an entire JDF file, more precisely the pages and the imposition data. The rest of the imposition settings are not required and are therefore not displayed. This mode is only available when you process JFD files as input (i.e. when you have a JDF Input Task Processor). This option should be disabled when you do not have a JDF Input Task Processor. With From input, Apogee uses the layout information (including marks) from the incoming JDF file.
From file:
Select this option if you want to import only the imposition data from an external Apogee layout file (PJTF, JT, or JDF). This selection will activate a File Selection pane and a Sheet Adjustment pane. In the File Selection pane, you locate the file that you want to import with the Browse button. In the Sheet Adjustment pane, only the Press sheet scaling option is activated. See “Sheet Adjustment” below for more information on this option.
From template:
Select this option if you have installed Imposition Template Manager with Apogee. In this case, the Signature Selection panel is enabled, and your imposition settings will be taken from the selected imposition template.
Apogee Impose
Select this option if you want to use the integrated Apogee Impose module to create the imposition for a job. See “Working with Apogee Impose” for more information. For Hot Tickets, the Run Auto Impose check box can be selected to ensure jobs created from the Hot Ticket are imposed using the Auto Impose settings.
Create backgrounds only
This check box is only visible if you have a DQS license. It is hidden if you have no license. This option is used in parallel with your PrintDrive mode of operation: It should be checked when you select DQS PrintDrive mode, or cleared when you select Normal PrintDrive mode.
Border
If you have a JDF Stripping license, Apogee allows you to select an imposition border, which can place various marks around each page, section or sheet. Borders are only supported for JDF input.
NOTE: This panel is displayed only when you choose ‘From input’ as your Imposition selection.
File Selection
Locate the PJTF, JT or JDF file that you want to import with the Browse button. Apogee will use the selected file to do the imposition. The Results tab shows the flat mockup. Apogee only uses the layout description and marks from a JDF file. If the file contains placed pages, they will be ignored (if you need the content from a JDF file, you should use the dedicated JDF input Task Processor).
This allows you to make Press sheet scaling and bottling adjustments (horizontal and/or vertical scaling percentages), in order to scale your output if your press sheet is too large or too small.
NOTE: This panel is displayed only when you choose ‘From file’ as your Imposition selection.
Signature Selection
This panel is displayed only when you choose ‘From template’ as your Imposition selection. The imposition settings will be taken from the selected imposition template. These settings are referred to as “signatures”. You can select signatures automatically or manually:
Automatically from <template>
Select this button if you want to select a template from the Available signatures panel, select a template and choose Auto Select. Apogee will automatically select the signatures from that template to cover the number of pages. The selected template is displayed in bold in the Available Signatures column.
NOTE: If you change the number of pages, the imposition Task Processor will have to rebuild the list of selected signatures. The list remains empty as long as the number of pages is unknown.
Manually
Select this button if you want to select the signature manually. You can select the required signature in the Available Signatures column and drag and drop it in the Selected Signatures column. You can also use the Add button.
Binding Style
Select the appropriate binding style from the drop-down list. The list of Available Signatures will be filtered accordingly.
Refresh All
If you change the templates in the imposition template folders, the list of Available Signatures is not dynamically updated. You therefore need to click the Refresh All button to update the list for the selected Binding style.
NOTE: Since a refresh may take some time, Apogee displays the animated “chasing arrows” busy indicator next to the button.
Available Signatures
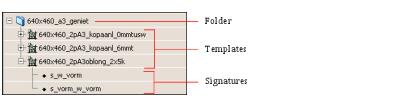
Displays a hierarchical list of template folders, filtered according to the selected binding style. Each folder may contain one or more subfolders containing at least one template with the selected binding style. You can expand these folders to select templates and signatures contained within these templates.
 |
You can drag and drop the required signatures from the Available Signatures column to the Selected Signatures column if you selected the Manual option. You can also select the signatures and click the Add button.
When you select a signature in either the Available Signatures or Selected Signatures columns, information about the Press Sheet and signature size is displayed below the list of signatures.
Selected Signatures
Displays (in the table on the right) the signatures you have selected.
Multiple sections
The Pages column on the right displays multiple page counts for signatures that have multiple sections. When you add such a signature, the different sections are added consecutively to the Selected Signatures table. You can change the order of each section separately, and can see at a glance which book signatures are part of a multiple-section signature: these rows have a section number. When you select one of these rows, Apogee displays a “linked” icon for the other sections from that same signature:
 | Indicates that this section is part of a multiple-section signature. |
You can click the Section column to select all linked sections.
First Page
By default, Apogee places the job pages consecutively onto the signatures, in the order as they appear in the signature list. The first page of each signature is therefore automatically determined by the number of pages that were placed on to the signatures that precede it.
However, for Perfect Bound templates you can override the first page of any signature by double-clicking the value in the ‘1st’ column, and entering a new value (you can also context-click). The number of the first page must be equal to or higher than the first page of the Run List. There is no upper limit for a first page; Apogee simply indicates the number of missing pages if you specify a value that is too high for the current Run List setup.
Manually adjusted first pages are displayed in bold: They are fixed, and do not change if you edit the signatures.
NOTE: The Run List must be big enough to accommodate all positions in the signature list.
You can reset a manually adjusted first page by editing it and leaving the number empty, or by context-clicking it and selecting Reset First Page from the context menu.
Rearranging Selected Signatures
You can use the Up and Down buttons below the Selected Signatures table to rearrange the signatures. You can also drag and drop them.
 |
Deleting Selected Signatures
Select one or more signatures, and click the Remove button to delete them.
Shingling
In the Shingling (Creep) panel, enter your inner and outer offsets. If you enter a positive number in the Inner and Outer fields, the image area moves toward the binding edge of the page. If you enter a negative number in these fields, the image area moves away from the binding edge of the page.
Page Position Adjustment
These settings allow you to adjust pages that are positioned inconsistently or incorrectly. You can apply horizontal and vertical offsets for odd and even pages.
•If you enter a positive number in the Horizontal field, the image area moves right on the page. If you enter a positive number in the Vertical field, the image area moves up on the page.
•If you enter a negative number in these fields, the image area moves left horizontally and down vertically on the page.
Sheet Adjustment
Press Sheet Scaling
These settings allow you to scale your output if your press sheet is too large or too small. You can enter a horizontal and/or vertical scaling percentage.
Bleed Margin Default
You can specify a bleed margin (the amount that an image or color extends to the trimmed edge of the printed page). You should use this when you have created templates with “default” bleed margins.
NOTE: The units of measurement displayed in this window are determined in your Preferences (see “General”).
In Apogee Imposition, the default bleed amount is 0.125 inch (3.175 mm), and is applied to all four sides of the pages. You can adjust the bleed amount to be smaller than the amount set in the source file. The new bleed amount applies only to the imposed job on which you are currently working.
The original bleed amount must be set in the source file. The bleed margins that you set are the final margins that will be printed around the trim size of the page.
NOTE: You can make single page adjustments by modifying the individual page in the Run List. For more information, see “To adjust page imposition in the Run List”.
doc. version 13.1.1