Templates
 |
Administrator access level only!
If you select the Asanti System in the Hardware pane, you will see the Templates icon in the Resources pane.
By double-clicking the Templates icon, you can access the Templates dialog box, which allows you to create, edit and manage the different types of templates (Job Tickets, Hot Tickets, Layout Tickets and Layout Hot Tickets). From here, you can edit an existing template and save it with a different name. This is very useful when you regularly need to create tickets for similar jobs. You can start from an existing template and make any necessary changes without having to create a completely new ticket from scratch. You can also create new templates from the Ticket Editor using the File > Save as Template command.
For more information on creating Tickets, see “Creating and Editing Tickets”. You can save the Ticket Templates in Template Folders. In this way, you can for instance group Ticket Templates that you use for a specific customer or print job.
Working with Template Categories
Template Categories are folders in which you can save your newly created Ticket Templates. You can group your Ticket Templates in different Template categories for specific types of jobs.
Administrator access level only!
To manage your template categories
1 In the System Overview, select the Asanti System icon in the Hardware pane.
2 Double-click the Ticket Templates Resources icon in the Resources pane.
|
The Templates dialog box appears.
3 Select either the Job Tickets tab or the Hot Tickets tab depending on for which type of Ticket Template you want to create or edit a Template Category.
4 In the Category list, do one of the following:
•Click the New button to create a new Template category, type the name of the new category and click OK.
 |
•Select a Template category and click the Edit button to edit it. Rename the Template category and click OK.
 |
•Select the Template category that you want to delete and press Delete or click the Delete button. Click ‘Yes’ to confirm the deletion.
 |
5 Close the Ticket Templates dialog box.
Working with Ticket Templates
In the Ticket Templates Resources category, you can edit, delete or set a Ticket Template as default.
Administrator access level only!
To manage your Ticket Templates
1 In the System Overview, select the Asanti System icon in the Hardware pane.
2 Double-click the Templates Resources icon in the Resources pane.
|
The Templates dialog box appears.
3 Select either the Job Tickets tab or the Hot Tickets tab depending on which type of Ticket Template you want to edit.
4 To select the Ticket Template that you want to edit, delete or set as default, do one of the following:
•Select the Ticket Template category in the Category list and select the Ticket Template that you want to edit.
•Select All in the Category list to view all of the Ticket Templates and select the Ticket Template that you want to edit.
5 Do one of the following:
•Click the Edit button to edit the Template in the Ticket Editor. Choose File > Save as Template and specify in which folder you want to save the Template. You can also save it under a new name. Click Save to save it.
|
•Click the Default button to set the Template as default. It will appear in bold in the Ticket Template list.
 |
•Delete the Template by pressing Delete or clicking the Delete button. Confirm the deletion.
|
6 Close the Ticket Template dialog box.
To export a Ticket Template
You may want to export a template for use by another Asanti System, or in order to have a temporary backup file.
NOTE: You can only import/export all ticket templates for a specific category.
1 In the Templates dialog box, select a template from the list and click the Export button.
 |
2 Locate the folder to which you want to export the template, and click OK.
The template is exported as a MIME format file (*.mime).
To import a Ticket Template
1 In the Templates dialog box, click the Import button.
 |
2 Locate the folder which contains the template you want to import.
This will be a template that was previously exported. This file will be in MIME format (*.mime).
3 Click Open.
The imported template is displayed in the list.
Create a StoreFront ticket template
A special job ticket template is required to create a job from the data downloaded automatically from the StoreFront application. Read the StoreFront Help for more information.
1 Create, set up and submit a new job
OR
Select an existing job in the Job List.
2 Choose File > Save As Template.
3 In the Templates dialog, select the Make available to StoreFront check box.
4 Choose a Category and enter a Name and Description.
5 Click Save.
When you choose File > New from Templates you will see the new template has been added to the list and it is indicated with the StoreFront icon.
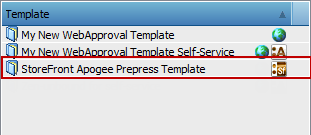 |
The icon is also visible in the Template list of the Templates resource.
NOTE: The StoreFront template can also be used for other jobs.
Creating Templates for Wide Format Jobs
When creating a template from a layout job, you have extra options to set the template as default for devices and for new jobs. Image processing automation can be achieved using presets (see “Presets”).
Create a ticket template for Wide Format jobs
doc. version 6.1.1