Prepress QMS Help : Basic Concepts : Consulting the Proofing Conditions for an Output Device
Consulting the Proofing Conditions for an Output Device
To consult proofing conditions of an output device:
1 Select a Proofer (e.g. Epson P5000) in the Output section of the modules window.
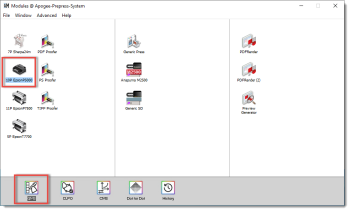 |
2 Double-click QMS. The Quality Management for Proofer window appears.
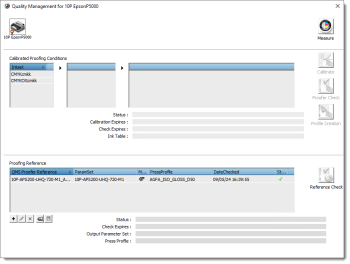 |
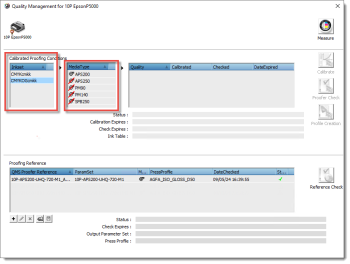
3 Select the ink set.
The list of media types will now appear. An icon in front of the media type shows if the media type is loaded or not.
 |
Loading Media
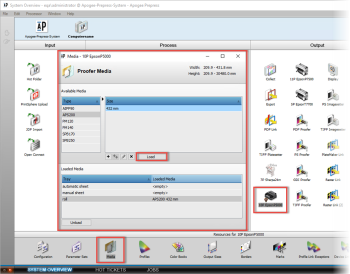
If the media you want to calibrate is not loaded, use the Apogee Client to load the media in the System Overview.
From the System Overview, select the proofer and double-click the Media Task Processor to open the Proofer Media window and load the media.
 |
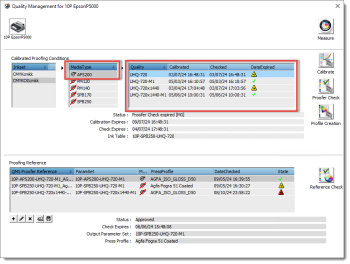
4 Select a media type (e.g. APS200). The quality modes for this media type, the dates of the last Calibration (Calibrated), Proofer Check (Checked), and the status of the ink table (DateExpired) will appear.
 |
The calibration (ink table) will be updated automatically, based on the measurements, to compensate and match the reference values again. Always check the status of the quality in QMS. It will be updated with a new expiration date for calibration and proofer check. To control the expiration dates, use the Preference Pane of “The QMS Tab”. Refer to “Calibration Status” for the description of the icons.
Calibration Status
A calibration (and proofer check) is only valid for a limited time frame. Calibration can expire or become invalid when a proof validation fails.
Icon | Status | Description |
|---|---|---|
 | Approved | The calibration and proofer check are valid. No failed proofer validations. |
 | Proofer check expired | The calibration is still valid but the proofer check is expired. It is recommended to do a proofer check. |
 | Calibration expired or Validation failed | • The calibration has been expired (beyond the expiration date). This quality needs to be calibrated again. • The validation of a contract proof has failed. Check calibration and profile to fix this. Eventually, reset the calibration status (context-click) when the failed validation was caused by a wrong job setup. |
 | Not supported | It is not possible to calibrate or do any proofer check on this quality. Not supported resources can be of a too low quality (imposition) or custom media resources without the proper Color Quality Manager license. |
5 Select a quality mode (e.g. UHQ-720).
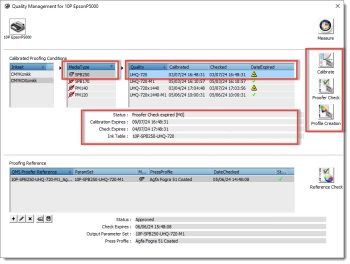
You will now view details about the selected quality mode under the Calibrated Proofing Conditions table. Also the Calibration button will be enabled. If the Proofer has already been calibrated in the past for the selected quality mode, the Proofer Check button and Profile Creation button will also be enabled.
 |
To redefine the Paper Feed Adjustment:
This option allows you to fine-tune the media paper feed to ensure that the length of a print (slow-scan printer direction) is accurately printed (i.e., a 1 m document will print exactly as 1 m).
NOTE: The paper feed adjustment can be used for any type of paper and quality mode.
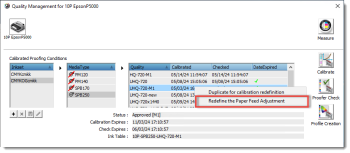
1 Select an ink set (e.g. CMYKOGcmkk), a media type (e.g. SPB250), and a quality mode (e.g. UHQ-720-M1). Context-click on the quality mode and select Redefine the Paper Feed Adjustment.
 |
2 Click the Print button.
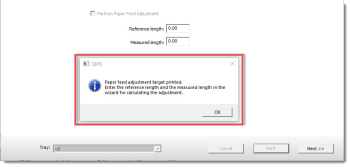
The test chart for the Paper Feed Adjustment is printed.
 |
3 The chart has two rulers: a vertical and a horizontal one.
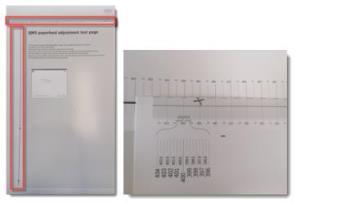 |
The lengths of the two rulers should match. Cut the horizontal one and position it precisely next to the vertical one. Make sure that the zero points are placed on top of the other. Look for a significant distance (400 mm), and check the distance from the horizontal guideline. In this example, the reference value is 400,00 mm with a measured length of 400,50 mm.
NOTE: It is recommended to use a magnifying glass (x8) when measuring the lengths.
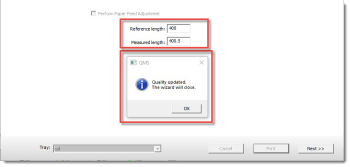
4 Fill in the Reference length and Measured length and click Next.
5 The quality will be updated. Click OK to complete.
 |
doc. version 13.1.3