Reference to a Proofer Benchmark
A reference is necessary for a benchmark to be compared to. This is the proofer at a specific point in time, in the case of a proofer benchmark (proofer reference check). Usually, this occurs when the proofer is in an almost perfect state (e.g. recently installed, updated profiles, saving a very satisfying status, etc.).
Defining Proofing References
To define a Proofing Reference:
1 Select a Proofer (e.g. Epson P5000) in the Output section of the modules window.
 |
2 Double-click QMS. The Quality Management for Proofer window appears.
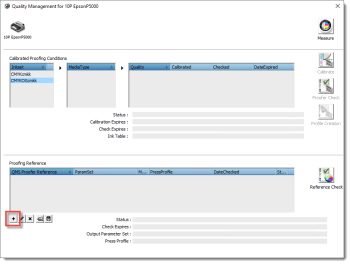 |
3 Under Proofing Reference, click the Plus icon  to start the Define Proofing Reference wizard. The Define New Proofing Reference window will appear.
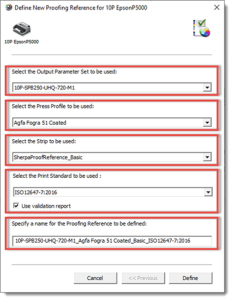
4 Select the Output Parameter Set, the Press Profile, the Strip, and the Print Standard to be used for the Proofing Reference from the drop-down lists.
NOTE: It is recommended to use the latest ISO standard ISO12647-7:2016, rather than to use a custom standard.
5 Specify a name for the Proofing Reference and click Next.
 |
6 You can now modify the deviation tolerances and the applied color difference equation, and custom parameters.
 |
NOTE: By default, the ISO values will be filled in. This screen is only applicable when Custom is selected for Print Standard.
7 Click Define. The Proofing Reference will be added to the server.
8 Click OK to return to the Quality Management for Proofer window.
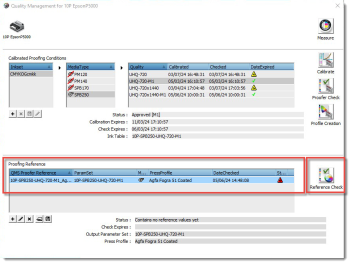
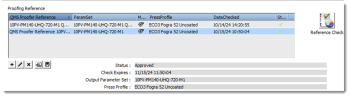
The Proofing Reference has been added to the Proofing Reference section of the window. A red alert triangle indicates that the Proofing Reference Check Strip has to be measured.
9 Select the Proofing Reference as shown below. You will now see details about the selected Proofing Reference under the Proofing Reference table. Also the Reference Check button will be enabled.
 |
Proofer Reference Check
When you define a Proofing Reference, it does not yet contain measured reference parameters and an expiration time. To determine these data, you have to print and measure the Proofing Reference Definition Target.
Also, you can print a Proofing Reference Check Target, to measure if the output of the Proofer still matches the quality requirements stored in the Proofing Reference Definition.
Printing the Proof to Reference Strip
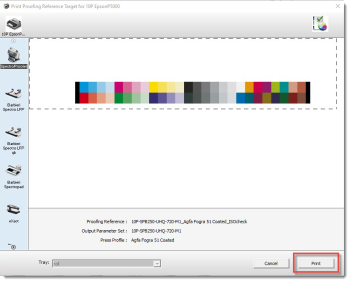
1 In the Quality Management for Proofer window, select the Proofing Reference. Click Reference Check.
 |
2 Print the target in accordance with the available measurement device. Select the device, eventually change patch size by double clicking on the device and click Print.
 |
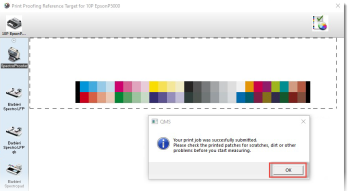
3 Click OK to return to the Quality Management window once the print job has been successfully submitted. See “Measuring and Interpreting the Proof to Reference Prints” on how to measure and interpret a Proofing Reference Check Report.
 |
Measuring and Interpreting the Proof to Reference Prints
1 In the Quality Management window, click Measure.
2 Measure the printed wedges with the available measurement device. The number of steps may vary depending on the measurement device.
3 At the end, a Proofing Reference Report is represented containing a summary of all the measured patches as well as all individual patches compared the stored reference measurements of the proofing reference set:
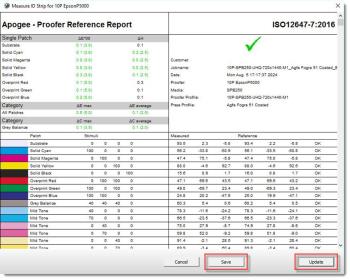 |
4 Click Save to store as PDF or Print to print the report. Click Update to finish and close the wizard. The time stamps in the Quality Management window will be updated. The proof to reference check is also added to the QMS history for future consultation.
 |
doc. version 14.0.1