Mark Attributes
The Attributes are explained for each Mark type.
Circle Mark Details
Mark Sets Categories: Pages, Fold Sheet, Press Sheet, Image, Sheet
The Circle Mark draws a rectangle with a border and fill color. This mark is always printed using knock-out.
Width
Specifies the horizontal size of the mark. You can create oval shapes by unlocking the link and entering different values for Width and Height.
Height
Specifies the vertical size of the mark.
Border pen
Choose a pen to draw the lines; lines have different thicknesses.
NOTE: The border is created on the inside of the bounding box.
Fill with color
This option is selected by default.
 |
Click the variable button, and select one or more options to determine on which plate(s) the mark will be printed:
 |
See “About Colors and Depth for Printing Marks” for more information on using colors to print marks.
Collation Mark Details
Mark Sets Category: Fold Sheet
 |
A Collation Mark combines a signature mark and a version mark to check that folded sheets are collated in the correct order for each version.
 |
Attributes tab
Step Area
The step area is the area in which the mark travels. The mark starts at the top (or bottom) of the step area, and advances one step with each section/signature.
•Position: You can choose to position the collation marks automatically, semi-automatically or manually.
•Automatically by Assembly Style: Apogee determines the target and position of the step area, based on the assembly style; in nested styles, Apogee Impose draws the mark on the closed-head, and in stacked styles it draws it in the outer spine.
•Spine: The marks are placed on the outer spine.
•Closed Head: The marks are placed on the last but one fold.
•Open foot: The marks are placed on the margin opposite to the closed head, on every page of the fold sheet, on both front and back sides.
•Overfold: The marks are placed on the innermost overfold.
•Faces: The marks are drawn on the face margin of every page of the fold sheet.
•Manually: You can define the position of the marks in the Position tab. See “Mark Position”.
•Offset from edges: The distance of the step area from the page trim edges. The default value is 0 mm.
•Thickness: The thickness (width) of the step area. The default value is 3 mm.
•Rotate: If you select manual positioning of the step area, you can also choose to rotate the marks.
•Knock-out: Select to knock out the area under the mark. The knock-area is the bounding box of the mark.
•Extend: Extends the knock-out area of the mark by the specified values for the left and right edges and for the top and bottom edges; can be used for conflict checking.
Stepping
•Number of Steps: Sets the number of steps in the step area:
•Fit within available space: Apogee calculates the number of steps possible in the available space.
•Fit within fixed length: enter a length and Apogee calculates the number of steps.
•Fixed: set the number of steps you require.
•Pattern: The pattern defines the position of the first mark, the direction in which the mark is stepped (normal or reverse), and what to do when arriving at the end of the step area (sawtooth or zigzag). Apogee graphically represents the four possibilities. The default is to use normal direction with the sawtooth movement.
 |
Signature Mark
The signature mark is the marking on the spine or fold of the folded sheets that indicates the signature. It is printed in black and may optionally contain an index number.
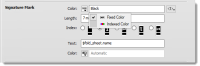 |
•Color: The color of the stepped blocks of the mark; the text in the mark is always white and knocked out of the blocks.
•Fixed Color: Specify any of the fixed color names. When Fixed Color is selected, you can choose the colors with the variable button
–
Color name | Description |
|---|---|
* | All colors (‘register’) |
! | The separation with the lowest L-value of all (‘darkest’) |
Cyan, Magenta, Yellow, Black | Fixed process colors, regardless of the ink-set used. |
C, M, Y, K | Short names for the fixed process colors. |
Spot1, Spot2, ... | Spot color by order of separation. |
White, Varnish, Primer | The special inks of ink-jet printers. |
•Indexed Color: The Color edit field becomes read-only when you use indexed colors, it shows the name of the selected Color palette, you can change the parameters of the indexed colors with the pen button.
See “About Colors and Depth for Printing Marks” for more information on using colors to print marks.
•Length: The length of the mark. Also sets the step size with which the mark is offset. Note that there is no gap between two adjacent marks.
•Index: Indicates the orientation of the index number: not printed, at 0 degrees, 90 degrees, 180 degrees, 270 degrees.
•Text: Selects the text to print. You can combine the literal text with variables. The default value is $fold_sheet.name. This field is disabled when the Index is set to None.
•Color: Selects the color to print the index. The default value is Automatic. This field is disabled when the Index is set to None.
•Automatic: Draws the text is with the same color as the shuttle’s color.
•Fixed Color: Specifies the color to draw with.
•Indexed Color: Selects the color palette.
Script and Font
Two drop-down lists for the script and font to be used for the index number. The default script is Roman which uses the Helvetica font by default.
For Chinese or Japanese, choose these from the Script drop-down list and then select an appropriate font for these languages from the Font drop-down list. Choosing Chinese or Japanese changes the writing direction of the index number to vertical. This writing direction can be combined with the index number orientation option.
NOTE: This dialog box always shows an Arabic number 1 as an example. The actual rendering can only be seen in the Press Sheet view or Raster Preview.
Versioning tab
Versioning
•Draw versioning collation mark in versioning jobs: Select to draw the versioning collation mark in versioning jobs.
Reserve Zone in Step Area
•Number of version Steps: Specifies how many steps to reserve for the version shuttle. The default value for percentage of steps is 33%.
•Fixed: Specifies the number of steps (nv). The number of steps must be larger than 1 and not cause the number of signature steps (ns).
•Fixed with fixed length: Specifies the length of the zone (V). The zone length must be at least twice the size of the shuttle and not cause the number of signature steps to become less than 2.
•Percentage of total steps: Specifies the percentage of the total number of steps to use. The value must not cause the number of signature steps to become less than 2.
•Automatic: Allows Apogee divide the step area using the same ratio as the number of signatures versus number of product versions. The number of steps in each zone must be always > 1.
•Space between version and signature marks: Enter the distance that you want between the two marks. When it is set to 0, both marks are edge-to-edge.
Version Mark
A colored mark placed next to the signature mark to indicate the version for a versioning job.
•Color: The color in which to draw the version shuttle rectangle.
•Automatic: Selects the color that is guaranteed to be unique for every product version. In case there is no such color the shuttle is printed in black.
•Fixed Color: Specifies a specific color.
•Indexed Color: Selects the color palette.
•Length: The length of the space to be reserved for the version mark; the width is the same as the signature mark.
•Index: Specifies how the version number is printed:
•Number only: print the version number without the ‘v’
•Short version name: print the version number with the ‘v’
•None: no version number will be printed
Pattern
Select the pattern in which direction the two shuttles move. If there are more positions requires than available, Apogee follows the Pattern selected in the signature mark.
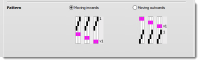 |
•Moving inwards: The first position of both shuttles are on the outside of the step area.
•Moving outwards: The first position of both shuttles are located where the two step areas meet.
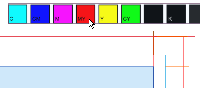
Color Bar Mark Details
Mark Sets Categories: Press Sheet, Image, Product Marks
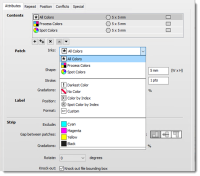
The Color Bar generates a bar of color patches using the colors that are present on the press sheet (offset and wide-format) or in the product.
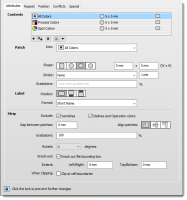 |
Contents
Each row shows the type of the element, the shape and stroke of the patch, the size, the local gradations and the presence and position of the label. You can add, duplicate, delete and change the order of elements in the list.
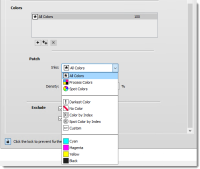
Patch
•Inks: Select the inks (colors) to add to the color bar. The drop-down lists the Inks’ options.
 |
.
Ink | Description |
|---|---|
All colors | Generates patches for all colors in scope. |
Process colors | Generates patches for all process colors in scope. |
Spot colors | Generates patches for all spot colors in scope. |
Darkest color | Generates a patch for the darkest color. |
No color | Generate a patch that prints no color. |
Color by index | Generates a patch that prints the specified ith color, with i being integer numbers starting from 1. |
Spot color by index | Generates a patch for the specified color specification, using the extended color specification syntax. |
Custom | Generates a patch for the specified process color. The menu shows a list of the colors in the currently selected ink set. In the Mark Engraver, the lists shows the four standard process colors (CMYK). |
Process color list | Generates a patch for the specified spot color. |
Spot color list | The menu shows a list of the actual spot colors that are in scope. The circular icons show the actual color. |
•Shape: Select the shape of the patch.
•Size: Specify the width and height of the patch. The shape always fills the specified size.
•Stroke: Specify how to stroke the patch.
•Registration: Prints the stroke in all colors in the current scope, same as "*".
•Darkest Color: Prints the stroke in the darkest color in the current scope, same as "!".
•None: Do not stroke the patch.
•Width: The width of the stroke. It is disabled when the stroke is set to None.
•Gradations: Specify the gradations as a comma-separated list of densities (0–100). An empty entry signifies that the patch follows the gradations of the bar. In that case, the field shows the text in gray text.
Label
•Position: Select whether to have no label or a label below or above the patch.
•Format: Select how to format the label.
•Short name: Print the short name of the color.
•Full name: Print the full name of the color.
•Short name, Gradation: Print the short name of the color and the gradation (without %).
•Single line: Select to print the gradation on the same line as the color name (separated by a space) or below the name (centered). It is disabled when not printing the gradation.
Strip
•Exclude: Select the special colors that will not be included when using any of the following patch entries; All colors, Process colors, Spot colors. These colors will not be listed in the color selection menus, either.
•Varnishes: Exclude all colors that are found in the Varnish category of the Special Colors.
•Dielines/Operation Colors: Excludes all colors that are found in the Dielines category of the Special Colors or that are recognized as Operations.
•Gap between patches: The gap between two successive patches.
NOTE: The bounding box of the color bar is at the edges of the outer patches; it does not include 1/2 gap size.
•Align patches: The vertical alignment of the patches when they have different heights. An empty value is interpreted and replaced by 100%.
•Gradations: Enter 1 or more comma-separated graduation values in range 1–100.
•Rotate: The rotation of the color bar.
•Knock-out: Select to knock out the area under the mark. The knock-area is the bounding box of the mark.
•Extend: Extends the knock-out area of the mark by the specified values for the left and right edges and for the top and bottom edges; can be used for conflict checking.
•When Clipping: Select to clip the mark (when it needs clipping) at the boundaries of each cell so that all patches are printed with the full size.
NOTE: The left and right edges of the bounding box of a color bar are always at the edges of a patch, i.e., it does not include the gap.
Crop Mark Details
Mark Sets Category: Pages, Image
 |
A Crop Mark is a horizontal and a vertical line to indicate where the page has to be cropped.
 |
Type
A drop-down list with 2 options for what the crop mark indicates:
•Page Trim: the final size of the pages
•Page Bleed: perpendicular lines at the corner of the bleed zone of a page, indicating the bleed area
Distance from corner
Specifies the distance between the center of the mark and the page corner; the page corner can be for the Page Trim or the Page Bleed.
Line length
Specifies the length of the mark.
Pen
Choose a pen to draw the lines; lines have different thicknesses.
Hiding
Selected by default and hides the marks between adjacent pages.
Shingling
Specify whether shingling is to be applied or not.
NOTE: Crop marks only have the Layer settings to be defined in the Position tab.
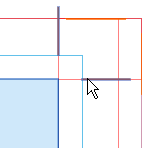
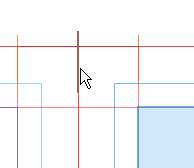
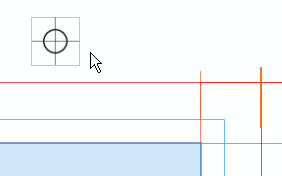
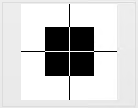
Cross Mark Details
Mark Sets Category: Fold Sheet
A Cross mark indicates the crosspoint of two gutters, or at the endpoint of a gutter. They are commonly used in web production schemes to verify the correctness of cutting, slitting, and folding.
 |
Length
Specifies the length of the line in a full cross, e.g. the line segments of a cap are half the specified length.
Pen
Choose a pen to draw the cross lines.
Hiding
Hides the marks on the outside of the fold sheet.
Cut Mark Details
Mark Sets Category: Fold Sheet, Sheet
 |
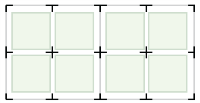
A Cut Mark is a horizontal and a vertical line in the corners of a Fold Sheet to indicate the boundaries of the Fold Sheet and where it is to be cut.
 |
Distance from corner
Specifies the distance between the corner end of the mark and the Fold Sheet corner.
Line length
Specifies the length of the mark.
Pen
Choose a pen to draw the lines; lines have different thicknesses.
NOTE: There is no option to hide marks between adjacent Fold Sheets.
Cut-off Mark Details
Mark Sets Category: Press Sheet
 |
A Cut-off Mark is a line that indicates where to cut between sheets in web printing. The line is drawn at the cut-off inside a single Web Production Scheme, but no marks are drawn when there is only one cut-off between schemes or when placed on a sheet-fed sheet. Cut-off marks are situated on the left- and right sides of the web and not at the edges of the ribbons.
Distance from sheet edges
Specifies the distance from the left and right edges of the sheet.
Line length
Specifies the length of the mark.
Pen
Choose a pen to draw the lines; lines have different thicknesses.
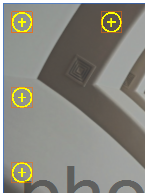
Cutter Registration Mark Details
Mark Sets Category: Sheet
 |
Cutter registration marks are reference dots which are drawn on a layout to enable cutting with X/Y cutting devices.
 |
Type
The following types of Cutter Registration marks are available:
•Filled circle
•Reversed circle
•Filled rectangle
•Reversed rectangle
Diameter/Width, Height
The diameter/width and height of the circle/rectangle.
Outer size
The diameter of the reversed circle.
Distance from images
The distance of the dots from the edge of the image or image block.
Color/Reverse Color
The colors of the filled circle and reversed circle can be specified separately. Click the variable button, and select one or more colors to change the color:
|
See “About Colors and Depth for Printing Marks” for more information on using colors to print marks.
Location
In the location panel, you specify where you want the dots to appear, and depending on the chosen location, the number of marks. The following options are available from the drop-down list:
Corners
Dots are placed at the corners of the image block. 3, 4 or 5 dots can be placed to indicate the lay of the cut block.
Individual Images
Dots are placed along a cut path that takes into account the nested arrangement of all the images. Here you can choose between Few and Many.
Top/Bottom
Dots are placed along the top and bottom of the image block, and you can set the number of dots by specifying the distance between them.
Left/Right
Dots are placed along the left and right side of the image block, and you can set the number of marks by specifying the distance between them.
All Sides
Dots are placed along all sides of the image block, and you can set the number of marks by specifying the distance between them.
Max. distance between marks
Set the distance between adjacent dots if you require more than the default number of dots.
Shift top/left marks
The offset applied to the dots on the top or left side.
Distance from
The distance of the dots from the edges of the images or media.
Density Bar Details
Mark Sets Category: Press Sheet
 |
The Density Bar mark draws bars of equal density across the full width of the press sheet or along the edges. A bar is drawn for each separation color. In the Conflicts tab, you can specify the action to be taken (fail the job, print mark, do not print the mark, notify) if the step area interferes with the content.
 |
Type
Top bars
Draws density bars at the top of the sheet and across the entire width of the press sheet or content block.
Edge bars: left or right
Draws smaller density bars, similar to patches, on the right or left side of the press sheet. These bars are centered on the specified edge, i.e. half the width falls outside the press sheet and is not clipped.
Custom
Lets you specify the location of the step area where the bars are drawn. Choosing this type enables extensive settings in the Position tab.
Step Area
This is the zone where the density bars are drawn on the press sheet – outside the content block (pages plus bleed) – so they do not interfere with the actual printed content. The available settings depend on the chosen type.
References
Select the Use press sheet margins as edge check box if you want to bring the bars within the margins of the sheet. Otherwise the bars extend to the edges of the sheet.
Position
Specifies where the bars will appear:
•At top of sheet: The top of the step area is at the top of the press sheet or against the margins, with the topmost bar against the top of the step area.
•Above content block: The bottom of the step area is against the top edge of the content block, with the bottommost bar against the bottom of the step area.
•At Gripper: The bottom of the step area is against the gripper.
•Center of press sheet: The vertical center of the step area is in the vertical center of the press sheet, with the bars centered vertically in the step area.
Height
Specifies the total height of the step area:
•Available space: Uses the space between the edge of the press sheet and the topmost margin of the content block, minus the offsets specified in the Offset From settings.
•Fixed: You can enter a value for the height of the step area.
Width
Specifies the total width of the step area:
•Across the press sheet: Prints the bars across the entire press sheet (with the margins), minus the offsets specified in the Offset From settings.
•Across content block: Keeps the bars within the width of the content block.
Offsets from
Enter a distance that the step area must keep away from the content block or sheet edges
Bars
Here you specify the height of the bars and the spacing between them.
Height
•Fill step area: The height of the step area is divided by the number of colors, minus the space between the bars, to obtain the height of the individual bars.
•Fixed: You specify the height of the individual bars.
Between bars
Specify the distance between the individual bars; the space can also be zero.
Colors
By default, each color in the job has its own bar. They appear in the same order as in the separation list of the Render task processor. You can control which colors are printed as follow:
Include
Choose which colors you want to print bars for:
•All colors: all kept and converted colors
•Process colors: all kept process colors
•Spot colors: all kept non-process colors
Except
Enter the names of the colors (not case-sensitive) that you do not want to print as color bars; separate the names with a comma.
File Mark Details
Mark Sets Categories: Pages, Fold Sheet, Press Sheet, Image, Sheet, Product
 |
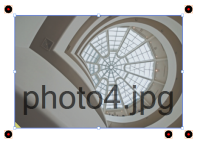
Use a File Mark, if you want to place a specific EPS or PDF file as a mark.
 |
File
Click the File list and select one of the available EPS or PDF files. The file is selected as the mark to be used and you see the size and number of colors used for the mark.
NOTE: You can open the Marks Resource by clicking the Open File Marks button, for example, to import a new mark.
•Scale: Specifies the scaling percentage of the file. The default is 100% in both directions. The link button keeps both directions at the same scale.
•Knock-out: Select to knock out the area under the mark. The knock-area is the bounding box of the mark.
•Extend: Extends the knock-out area of the mark; can be used for conflict checking.
When clipping
Only enabled if the selected file has an internal cell structure. Select if you only want the mark to be clipped at the cell boundaries of the mark (e.g. color bars); clear if it is alright to clip the mark anywhere.
Rotate
Specify the rotation angle for the mark (0, 90, 180, or 270 degrees).
NOTE: The selected file is copied into a reserved directory on the server.
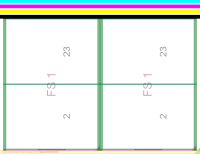
Fold Line Mark Details
Mark Sets Category: Pages Fold Sheet
 |
A Fold Mark draws a set of vertical or horizontal lines that indicate where to fold the sheet, mainly for bound products. Fold marks are not drawn on spread-based covers or unbound flat elements. For unbound folded work, the outside fold lines are drawn but not the lines between pages.
 |
Distance from page trim
Specifies the distance from the nearest end of the mark to the page trim.
Line length
Specifies the length of the mark.
Pen
Choose a pen to draw the lines; lines have different thicknesses.
NOTE: Fold marks only have the Layer settings to be defined in the Position tab.
Fotoba Mark Details
Mark Sets Category: Sheet
 |
Fotoba marks consist of horizontal and vertical lines which are drawn on a layout to enable cutting with a Fotoba cutting device.
 |
Horizontal/Vertical Cut Marks
Fotoba cut marks are drawn along the horizontal and vertical sides of the individual images on a layout. Horizontal lines are drawn by default and you can optionally specify vertical lines.
Type: Single mark, Double mark
Draws single or a double lines to indicate cutting.
Line thickness
The thickness of each line.
Inner white
The distance between the lines of a double mark.
Side Mark
The side mark is a vertical line which is drawn in addition to the vertical cut mark.
Distance from image
The distance from the image to the side mark.
Line thickness
The thickness of the side mark line.
Color
The color of all the cutting lines. Click the variable button, and select one or more colors to change the color of the cutting lines:
|
See “About Colors and Depth for Printing Marks” for more information on using colors to print marks.
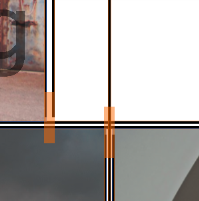
Grommet Mark Details
Mark Sets Category: Image, Sheet
 |
Grommet marks are sequential marks which are placed along the sides of an image or layout. These marks are printed on the layout and indicate where reinforced eyelets (grommets) can be produced. The marks are not part of the cut file.
 |
Mark
First you specify the appearance of the marks.
Grommet type
Three types of grommet marks are available:
•Circle
•Circle with cross
•Cross
Diameter
The diameter of the circle.
Line thickness
The thickness of all the lines.
Line length
The length of the 2 lines of the cross.
Color
The color of all the cutting lines. Click the variable button, and select one or more colors to change the color of the cutting lines:
|
See “About Colors and Depth for Printing Marks” for more information on using colors to print marks.
Placement
In the placement panel, you specify where you want the grommet marks to appear.
Placement
You can choose to place the grommet marks along all sides of the image or layout, left and right, or top and bottom.
Distance from edge
The horizontal and vertical distances of the grommet from the edge of the image or sheet.
Max. distance between marks
The maximum horizontal and vertical distances between adjacent marks.
Ink-Eater Mark Details
Mark Sets Category: Press Sheet
The Ink-Eater Mark places a background mark (one large mark or repeated) between the products or on the outside of the fold sheets. The ink-eater can use all of the available space of a press, within the printable area of the press.
Target
The Target section defines which area of the sheet you want to fill with the ink-eater.
•Area to fill: Select the area to fill.
•Press sheet: The area defined by the left, right, top and gripper edges. You can reduce the area by specifying the values in the Reduce by attribute. Positive values reduce the area.
•Product block: The area defined by the bounding box of the bleed paths from all products on the sheet. You can extend the area by specifying the values in the Extend by attribute.
•Reduce/Extend by: Extra space to add to the Product block or to subtract from the Press sheet. The default value is 0 for both cases.
Mask Products
The Mask section defines how to protect the content: You can select whether to mask the contour or the bleed.
•By: Select the path to be used to mask the products:
•Bleed: Use the product’s bleed path.
•Contour: Use the product’s contour-defining path.
•Extend by: Extend the product mask by the specified amount.
Type
The Type section defines the type of the mark. The manual types draw a bar for each included color and repeat these across the entire width or height of the sheet. You can select the orientation and direction and set the densities of each color.
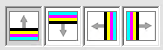 |
•Bars Up: Creates an ink-eater with bars across the width of the sheet, starting at the bottom of the ink-eater zone and repeating upwards to the top of the zone.
•Bars Down: Creates an ink-eater with bars across the width of the sheet, starting at the top of the ink-eater zone and repeating downwards to the bottom of the zone.
•Bars Left: Creates an ink-eater with bars across the height of the sheet, starting at the left of the ink-eater zone and repeating rightwards to the right of the zone.
•Bars Right: Creates an ink-eater with bars across the height of the sheet, starting at the right of the ink-eater zone and repeating leftwards to the left of the zone.
•Number of steps: Select whether to specify a fixed number of repetitions or to allow the ink-eater to calculate it.
•Automatic: Select to allow the ink-eater to calculate the number of repetitions, given the Minimum size of a single bar.
•Fixed: Select to allow the ink-eater calculate the size of the bars, given the Number of repetitions.
•Minimum size: The minimum size of a single bar.
Colors
The Color section defines the colors to include. You can add, duplicate or remove the colors from the list.
Patch
The color or color generator chosen for the selected entry in the Color list.
 |
NOTE: The darkest color is set per side, not per zone.
•Density: The density to print the colors of the selected patch with.
NOTE: When using a mixed color entry, the density applies to all components, e.g. you can mix 60% Cyan, 40% Magenta and set the density to 40%. The end result will be a color of 24% Cyan and 16% Magenta.
Exclude
Select if the special colors to be excluded by the color generators.
•Varnishes: Excludes all colors marked as varnish.
•Dielines and Operation colors: Excludes all colors marked as contours and other Operations.
Line Mark Details
Mark Sets Categories: Pages, Fold Sheet, Press Sheet, Image, Sheet
 |
The Line Mark draws a line that can be used for various purposes in production.
Type
You can choose to draw a line at a specific location and with a specified size (custom), or let the line resize automatically to match a chosen target (auto-sizing).
Auto-sizing line settings:
Target
Choose the edge where you want to place the line (left, right, top, bottom) and the target box (page, fold sheet, spine, etc.). The available targets depend on the mark category. In the Offset field you can specify a distance from inside or outside the target box. The distance is from the center of the line to the target.
Length
An auto-sizing line is delimited by the target box you chose to position the line, (from target), or from other available boxes depending on the mark category.
Extend
Enter a negative or positive value to respectively shorten or extend the line in both directions.
Pen
Choose a pen to draw the lines; lines have different thicknesses.
Custom line settings:
Length
Specifies the length of the mark.
Pen
Choose a pen to draw the lines; lines have different thicknesses.
Angle
Specify the rotation angle for the mark (0, 90, 180, or 270 degrees).
Page Fold Line Mark Details
Mark Sets Category: Pages
|
A Page Fold Line Mark draws a set of vertical or horizontal lines that indicate where to fold on a single page element.
Distance from page trim
Specifies the distance from the nearest end of the mark to the page trim.
By default, Apogee Impose only prints the fold marks on the outside of the page, but not on the inside. To draw them on the inside of the page, specify a negative value for Distance from page trim and allow the mark to overlap the page content.
Line length
Specifies the length of the mark.
Pen
Choose a pen to draw the lines; lines have different thicknesses.
Rectangle Mark Details
Mark Sets Categories: Pages, Fold Sheet, Press Sheet, Image, Sheet
 |
The Rectangle Mark draws a rectangle with a border and fill color. This mark is always printed using knock-out.
Around
Choose the reference for drawing the mark. Choose Custom to use all the options on the Position tab, or choose a target object (Image block, sheet, etc.) if you want to draw the mark around an object. The available objects depend on the mark category.
Expand
If you choose a target object for the Around option, you can also set a distance from the object where the mark will be drawn. Enter a positive value to draw a mark which is larger than the object (e.g. a rectangle around an image block), or a negative value for a mark which is smaller than the object.
Width
Specifies the horizontal size of the mark.
Height
Specifies the vertical size of the mark.
Border pen
Choose a pen to draw the lines; lines have different thicknesses.
NOTE: The border is created inside the mark.
Fill with color
This option is selected by default.
 |
Click the variable button, and select one or more options to determine on which plate(s) the mark will be printed:
|
See “About Colors and Depth for Printing Marks” for more information on using colors to print marks.
Registration Mark Details
Mark Sets Category: Press Sheet, Fold Sheet, Sheet
 |
A Registration Mark draws a series of marks which are used to check that the registration of the different printing colors is correct.
 |
File
Click the File list and select one of the available EPS or PDF files. The file is selected as the mark to be used and you see the size and number of colors used for the mark.
The preview pane shows the selected mark.
 |
NOTE: You can open the Marks Resource by clicking the Open File Marks button, for example, to import a new mark.
Knock-out
Select to knock out the area under the mark. The knock-area is the bounding box of the mark.
Extend
Extends the knock-out area of the mark; can be used for conflict checking.
Rotate
Specify the rotation angle for the mark (0, 90, 180, or 270 degrees).
Where
Click in the diagram to specify where the mark is printed on the Press Sheet: in the four corners, the four center-side positions, or any other combination.
 |
Offset from edges
Distance between the center of the mark and the edges of the Press Sheet (including the lay).
Slit Mark Details
Mark Sets Category: Press Sheet
 |
A Slit Mark is a line indicating where a sheet is to be cut in ribbons, as used in web printing. A line is drawn between two adjacent ribbons and not on the outer edges of the web. No marks are drawn when only one ribbon is present or if sheet-fed sheets are used. The position of the Slit Mark is defined in the Attributes tab and not in the Position tab.
Distance from sheet edges
Specifies the distance from the sheet’s leading and trailing edges.
Line length
Specifies the length of the mark.
Pen
Choose a pen to draw the line; lines have different thicknesses.
Station Number Mark Details
See Text Mark Details, except for the Text field which is a number that is generated automatically to indicate the position of the product on a sheet.
Text Mark Details
Mark Sets Categories: Pages, Fold Sheet, Press Sheet, Image, Sheet, Product
 |
Text Marks are used to print text on a Press Sheet and identify Press Sheets by printing the job name, order number, color name, etc.
Text
In the Text field, you can specify which text is to be used as a mark. You have three options:
•Type some text in the Text field.
•Select a variable from the drop-down list. This list appears when you click in the Text field the button next to the field.
•A combination of the two previous methods, e.g. some text followed by a variable
Font
Select a font and a point size for the text mark.
Length
If you want you can change the calculated length of the text mark which is based on the amount of text, the point size and the variable. You can revert to the default, calculated length by clicking the revert arrow.
Script
Select a Roman, Chinese, Hebrew or Japanese script for the text mark. Choosing Chinese or Japanese activates the Writing Direction option.
NOTE: If you choose Chinese or Japanese, don’t forget to select a relevant font for these languages in the Font drop-down list.
Writing Direction
Horizontal is selected by default for Roman script (e.g. European languages) and can’t be changed; choosing Chinese or Japanese script activates the following options:
Horizontal
Select this option to place the text characters horizontally; the text is left-aligned in the text box.
 |
NOTE: The anchor point in the Mark Position tab is also used for aligning a Text mark. For example, placing a Text mark in the top right position means the text will grow from right to left and it is right-aligned in the text box.
Vertical
Select this option to place the characters underneath each other (certain Asian languages).
 |
Use Arabic Numerals
Select this option to use Arabic numerals in vertical text.
Color
Click the variable button, and select one or more options to determine which plate(s) will print the mark:
|
See “About Colors and Depth for Printing Marks” for more information on using colors to print marks.
Readability
Select the options to improve the readability:
•Underline text: Underlines the text.
•Outline text: The text is outlined with a 1-point line at 0% of the specified text color, printed in knock-out around the type.
•Knock-out text box: Knocks out the area under the text. The knock-out area is the bounding box of the mark.
Extend
Extends the knock-out area of the mark; can be used for conflict checking.
Rotate
Specify the rotation angle for the mark (0, 90, 180, or 270 degrees).
doc. version 13.1.1